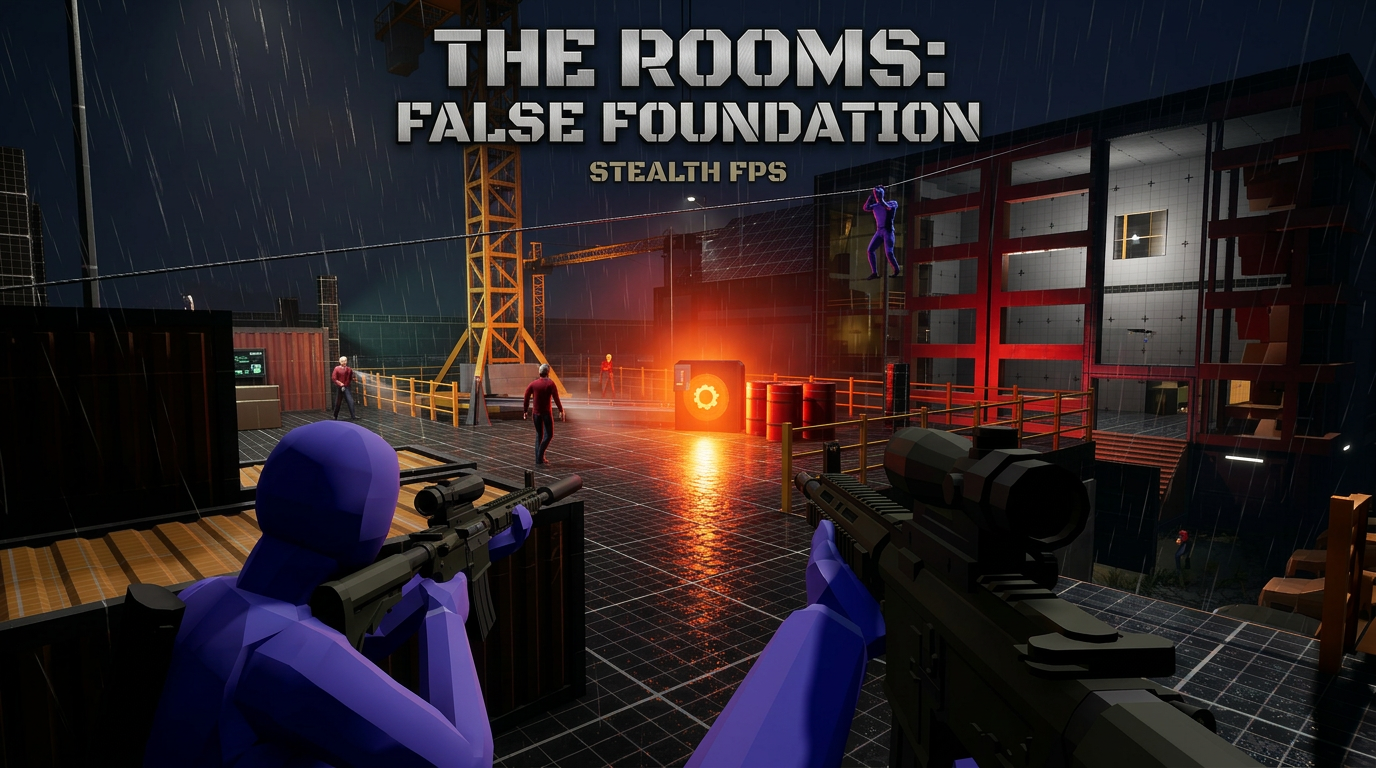
A 15–20 minute tactical stealth mission on the rainy cliffs of St. John’s, Newfoundland. Infiltrate a construction zone, uncover a bombing plot, and defuse explosives before a 10-minute fail-safe timer hits zero — built solo in UE5.
In The Rooms: False Foundation, players control Sid, a skilled spy infiltrating a high-security construction zone adjacent to a famous Newfoundland museum. What begins as a routine financial investigation spirals into a race against time when Sid discovers a terrorist plot to disguise a massive bombing as a “construction accident.”
Ghost vs. Panther
Every encounter supports silent non-lethal play (vents, shadows, distractions) and aggressive tactical combat (environmental kills, flanking routes).
Environmental Lethality
Cranes drop heavy loads, electrical grids can be weaponized, and gas tanks become traps — turning every room into a combat puzzle.
High-Stakes Atmosphere
Rain, fog, red sniper lasers, and guard radio check-ins create constant tension. Heartbeat audio and squeaky floors make every movement consequential.
Vertical Infiltration
Multiple entry points span massive height differences — from crane jumps to hidden maintenance rails. Higher paths offer better intel but greater danger.
The level must communicate a major narrative shift — from a simple financial investigation into a critical counter-terrorism mission — using level geometry and environmental storytelling rather than scripted cutscenes.
Design Goal
Problem: How to design a non-linear stealth sandbox that provides total player agency while transitioning from a quiet, methodical investigation into a high-stakes, time-sensitive thriller.
Approach: I used a “Ghost vs. Panther” philosophy with multi-layered verticality — ziplines, gate breaches, and maintenance rails. The climax is player-triggered: disabling the signal in the Archives activates a 10-minute automatic fail-safe timer.
Result: A 15–20 minute experience that escalates from 3/10 difficulty during yard exploration to 9/10 during the final bomb dash, with every room supporting environmental lethality and a tense, Hitman-inspired atmosphere.
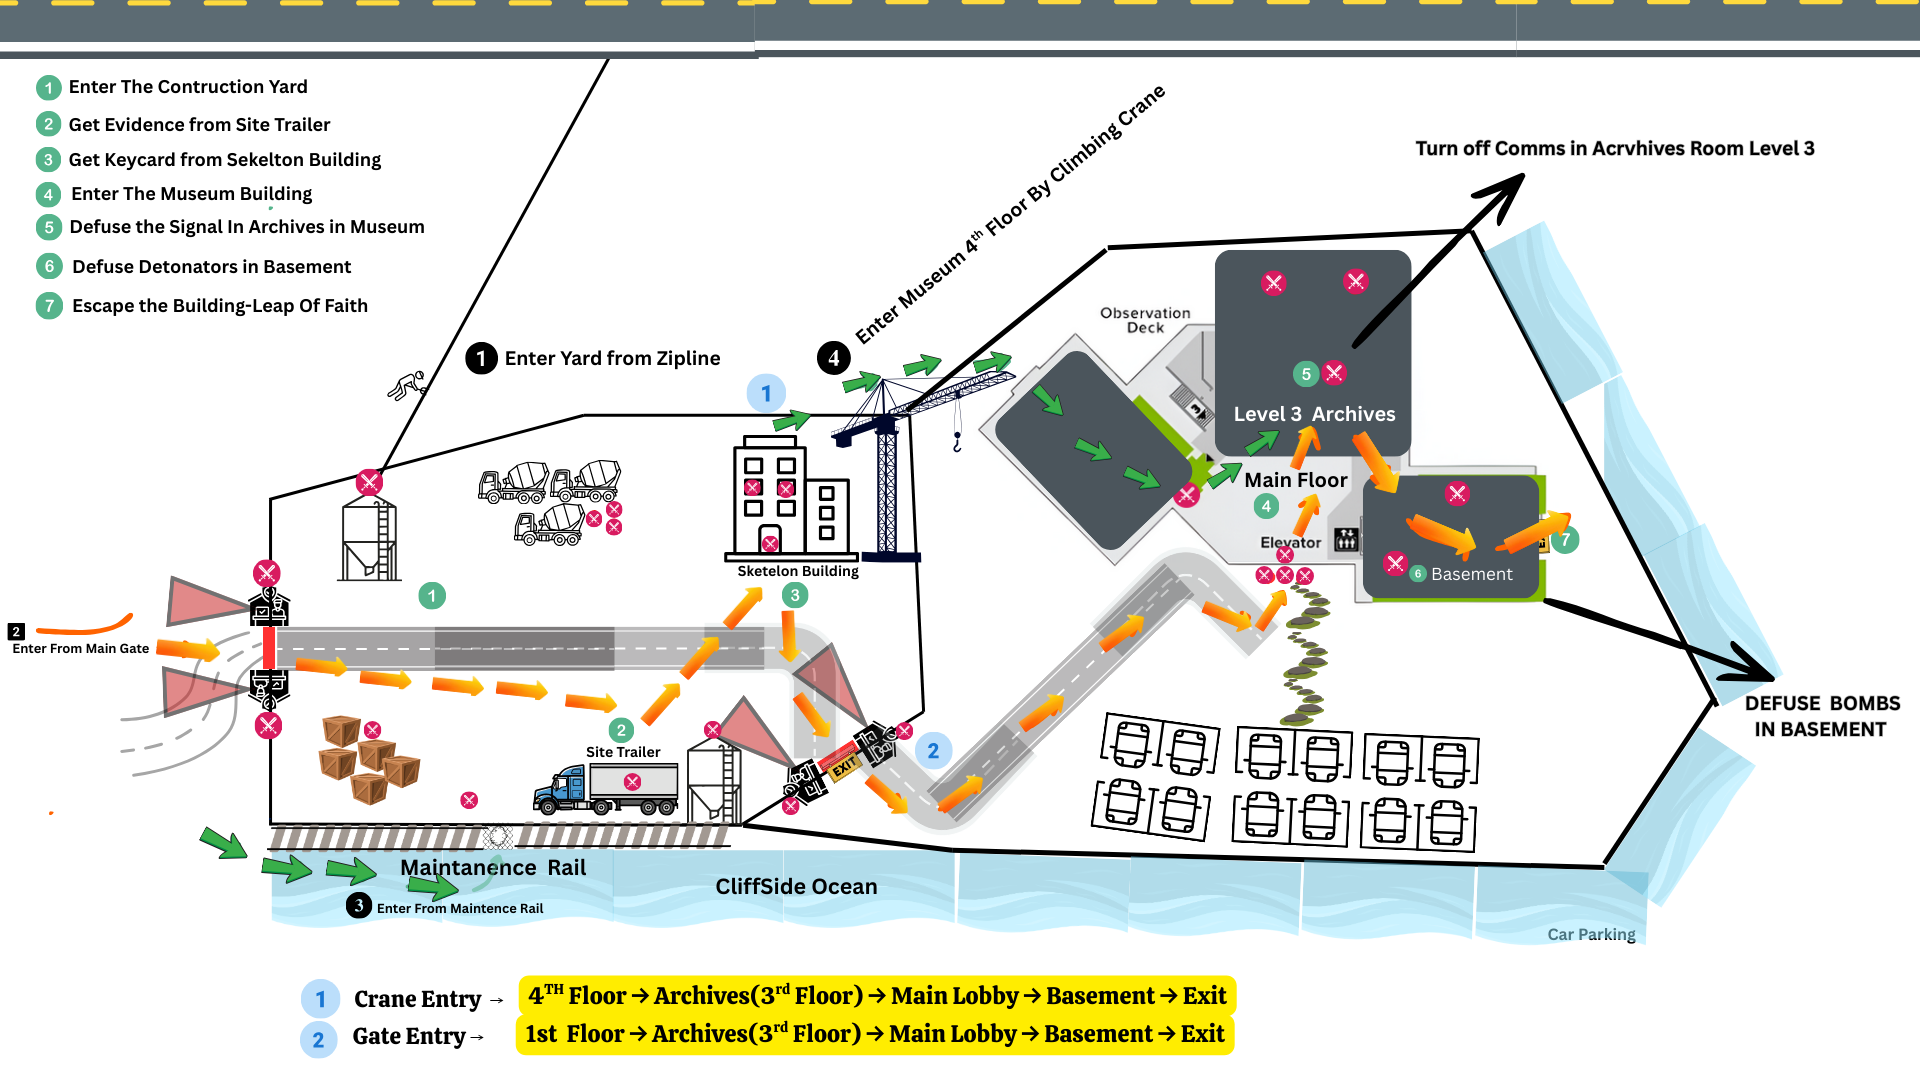
Level Flow
The level is divided into three primary zones with multiple entry paths connecting them. Three entry points give immediate agency: the high-risk zipline, the main gate, and the maintenance rail — all converging at the Site Trailer.
Fig 01. Top-down map — three entry points (zipline, main gate, maintenance rail) converge at the Site Trailer regardless of approach.Fig 02. 3D zones overview showing vertical layers and player flow through dock, yard, skeleton building, museum, and basement.
Walkthrough
Key design moments where mechanics, narrative, and spatial design work together — not every room, but every beat that matters.
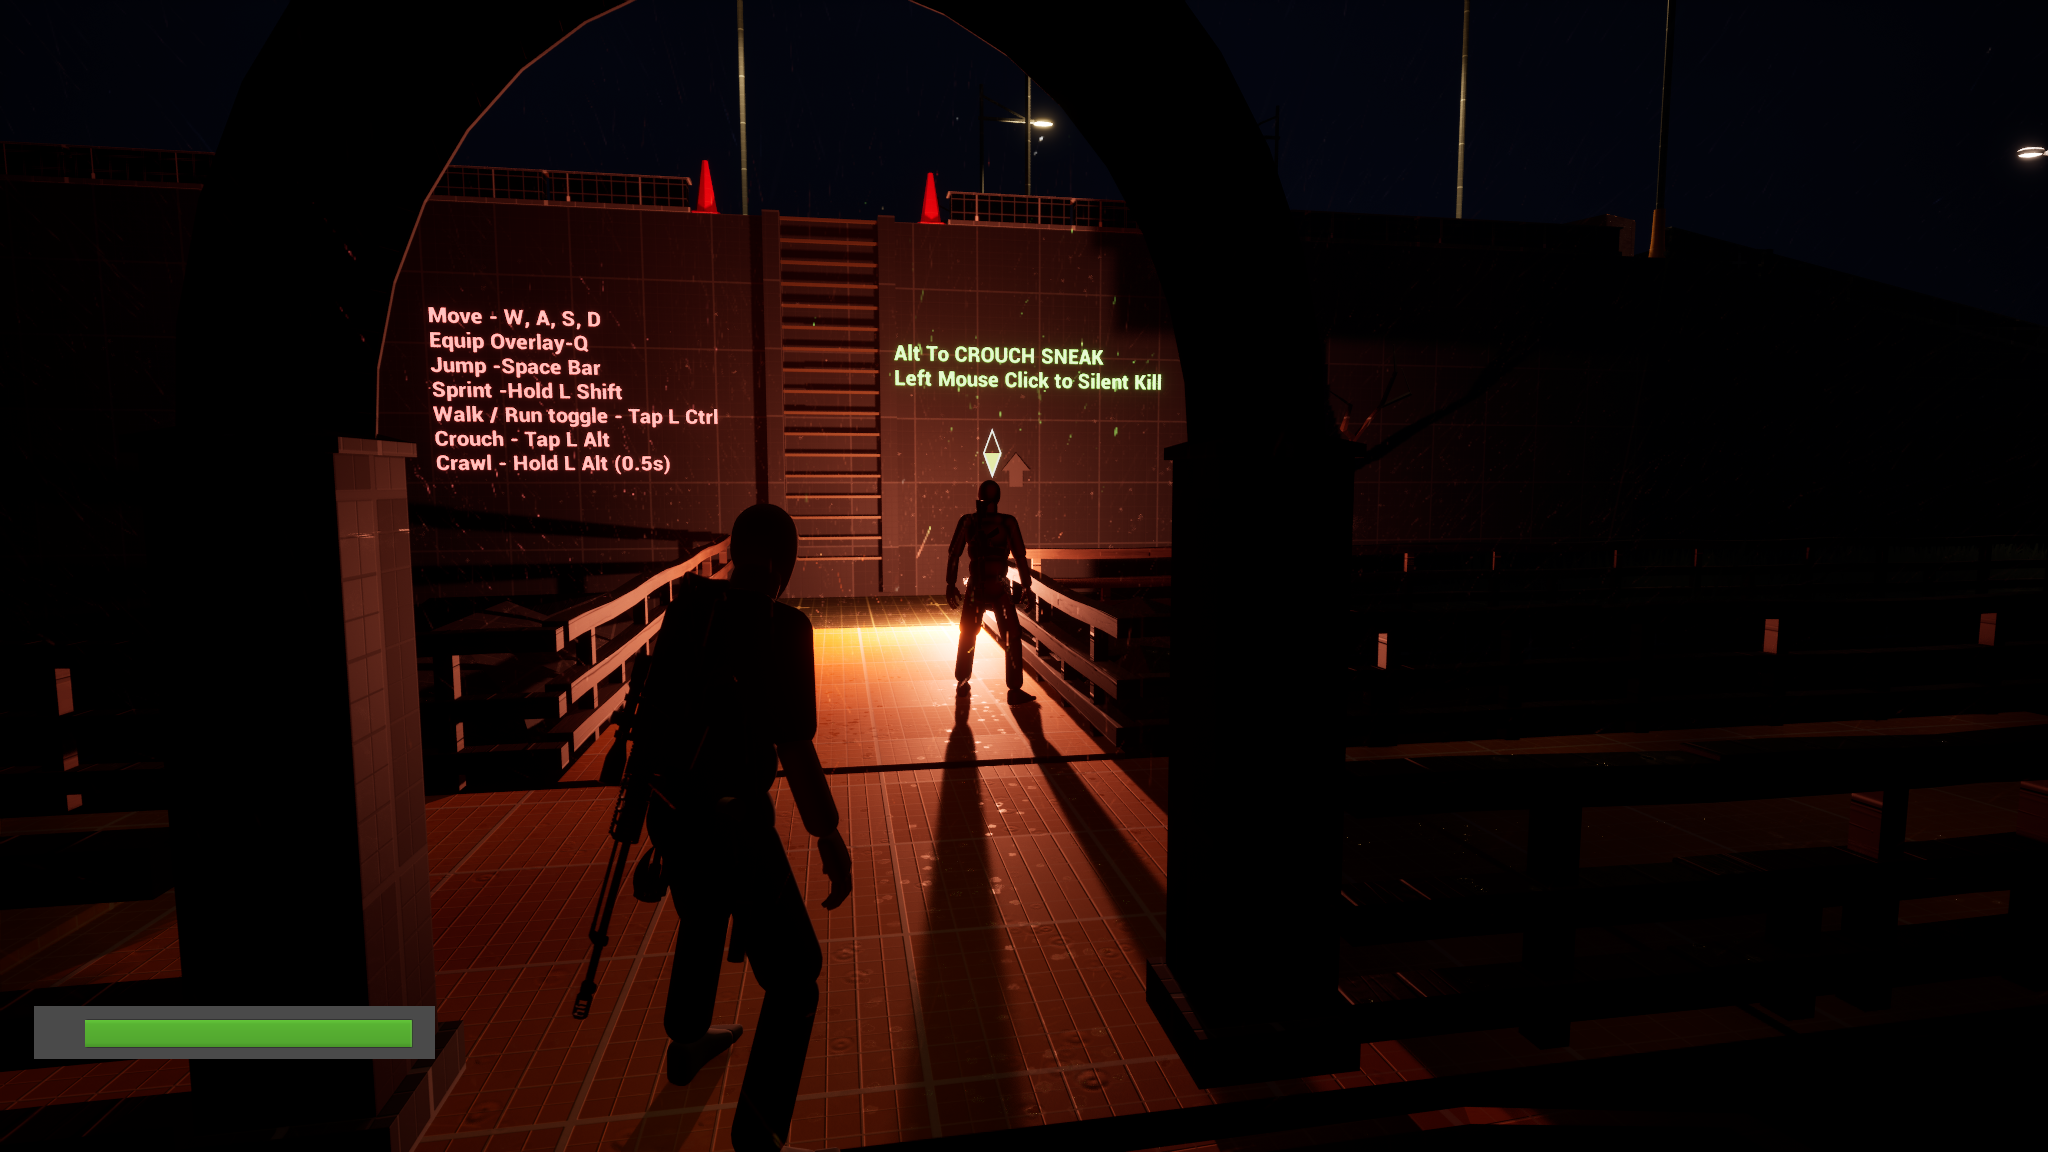
The mission begins at a cold, rainy boat dock. A single Searcher guard in high-contrast orange light creates an immediate stealth puzzle requiring the player’s first tactical takedown.
Fig 1. The archway funnels the player toward the guard and integrated tutorial text (“ALT TO CROUCH SNEAK”). After the takedown, the ladder establishes that climbs are always viable paths.
02
The Infiltration — Foreshadowing & Subtle Guidance
Difficulty: 4/10 · Duration: ~1 min · Stealth / Infiltration
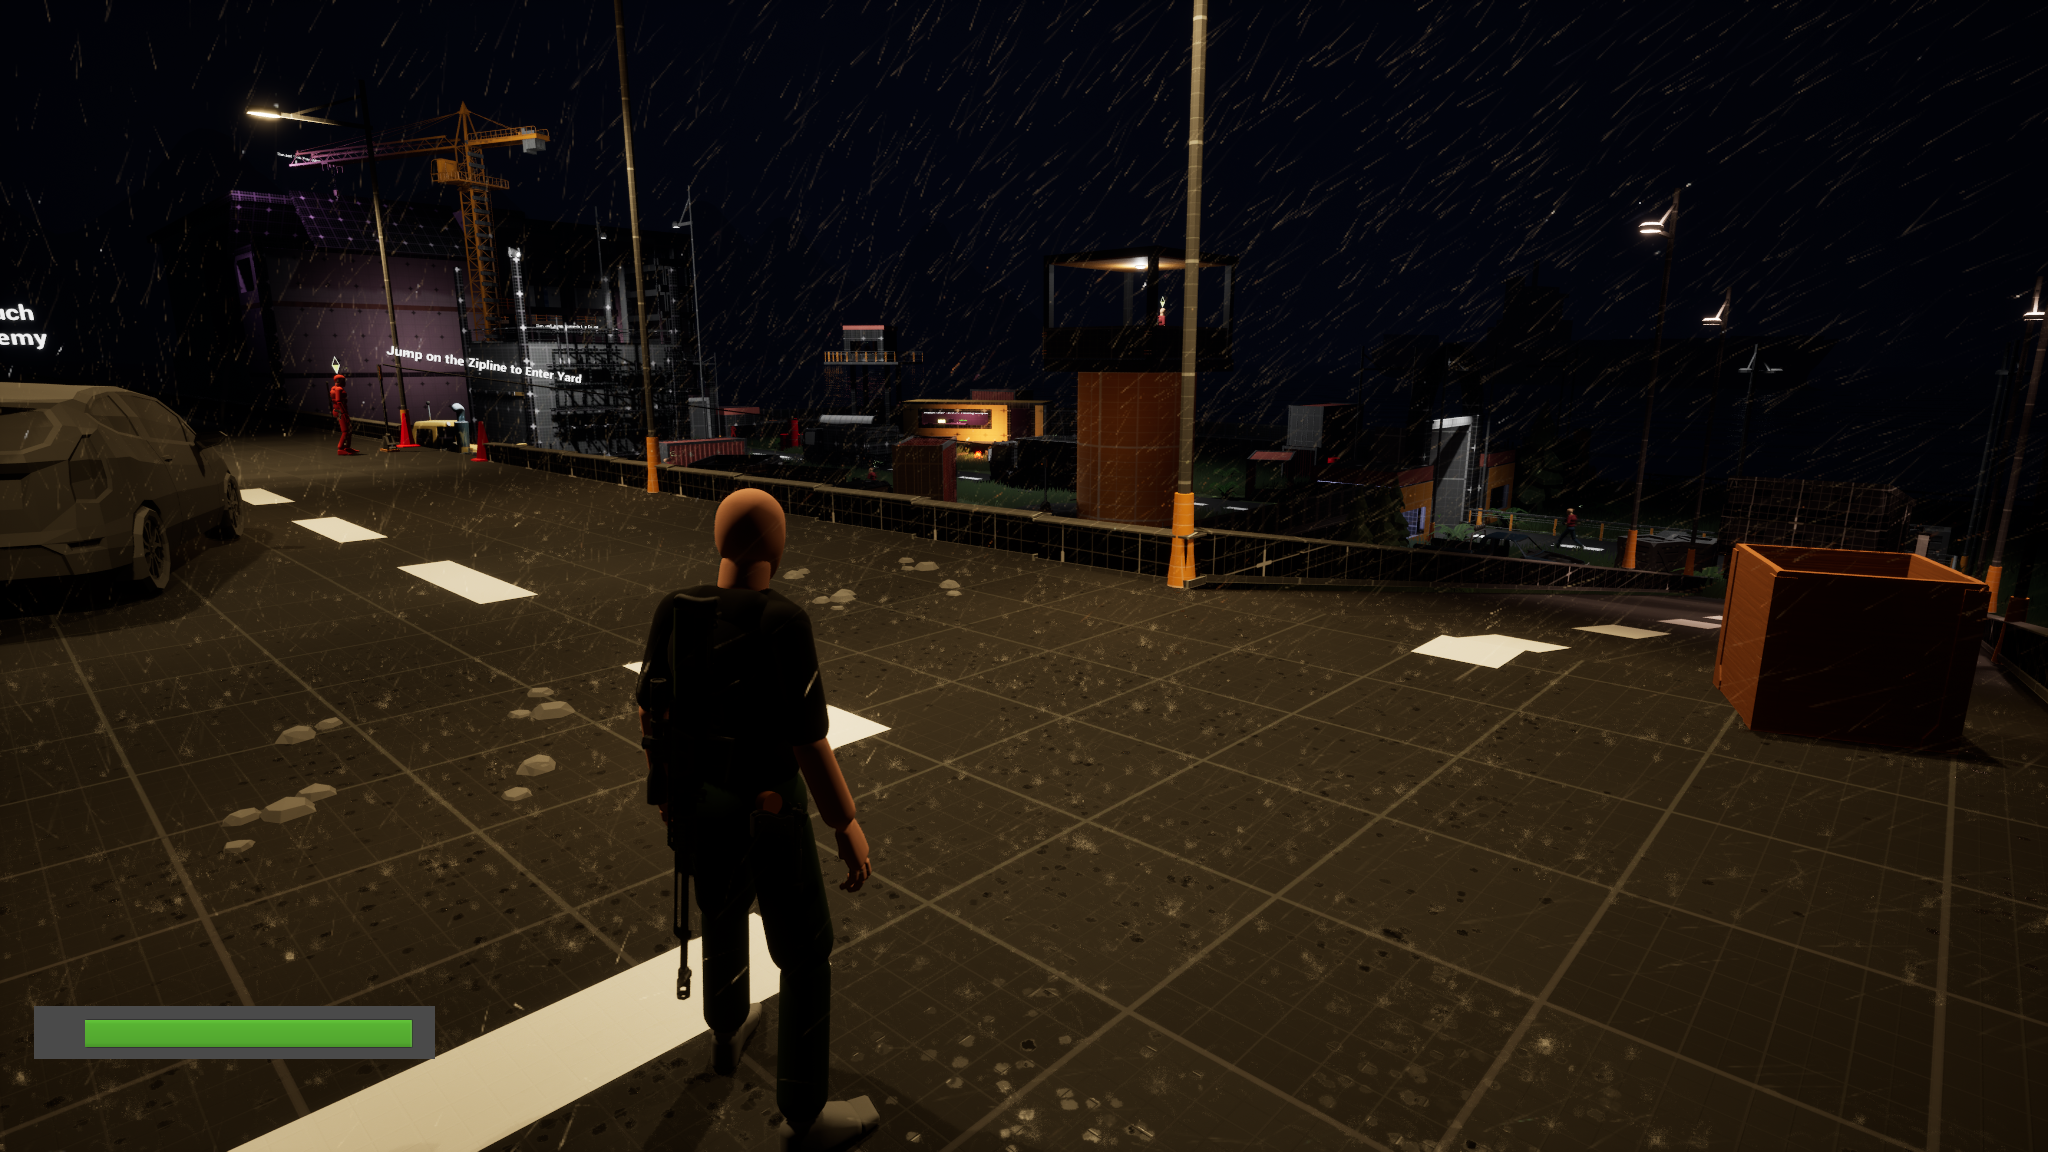
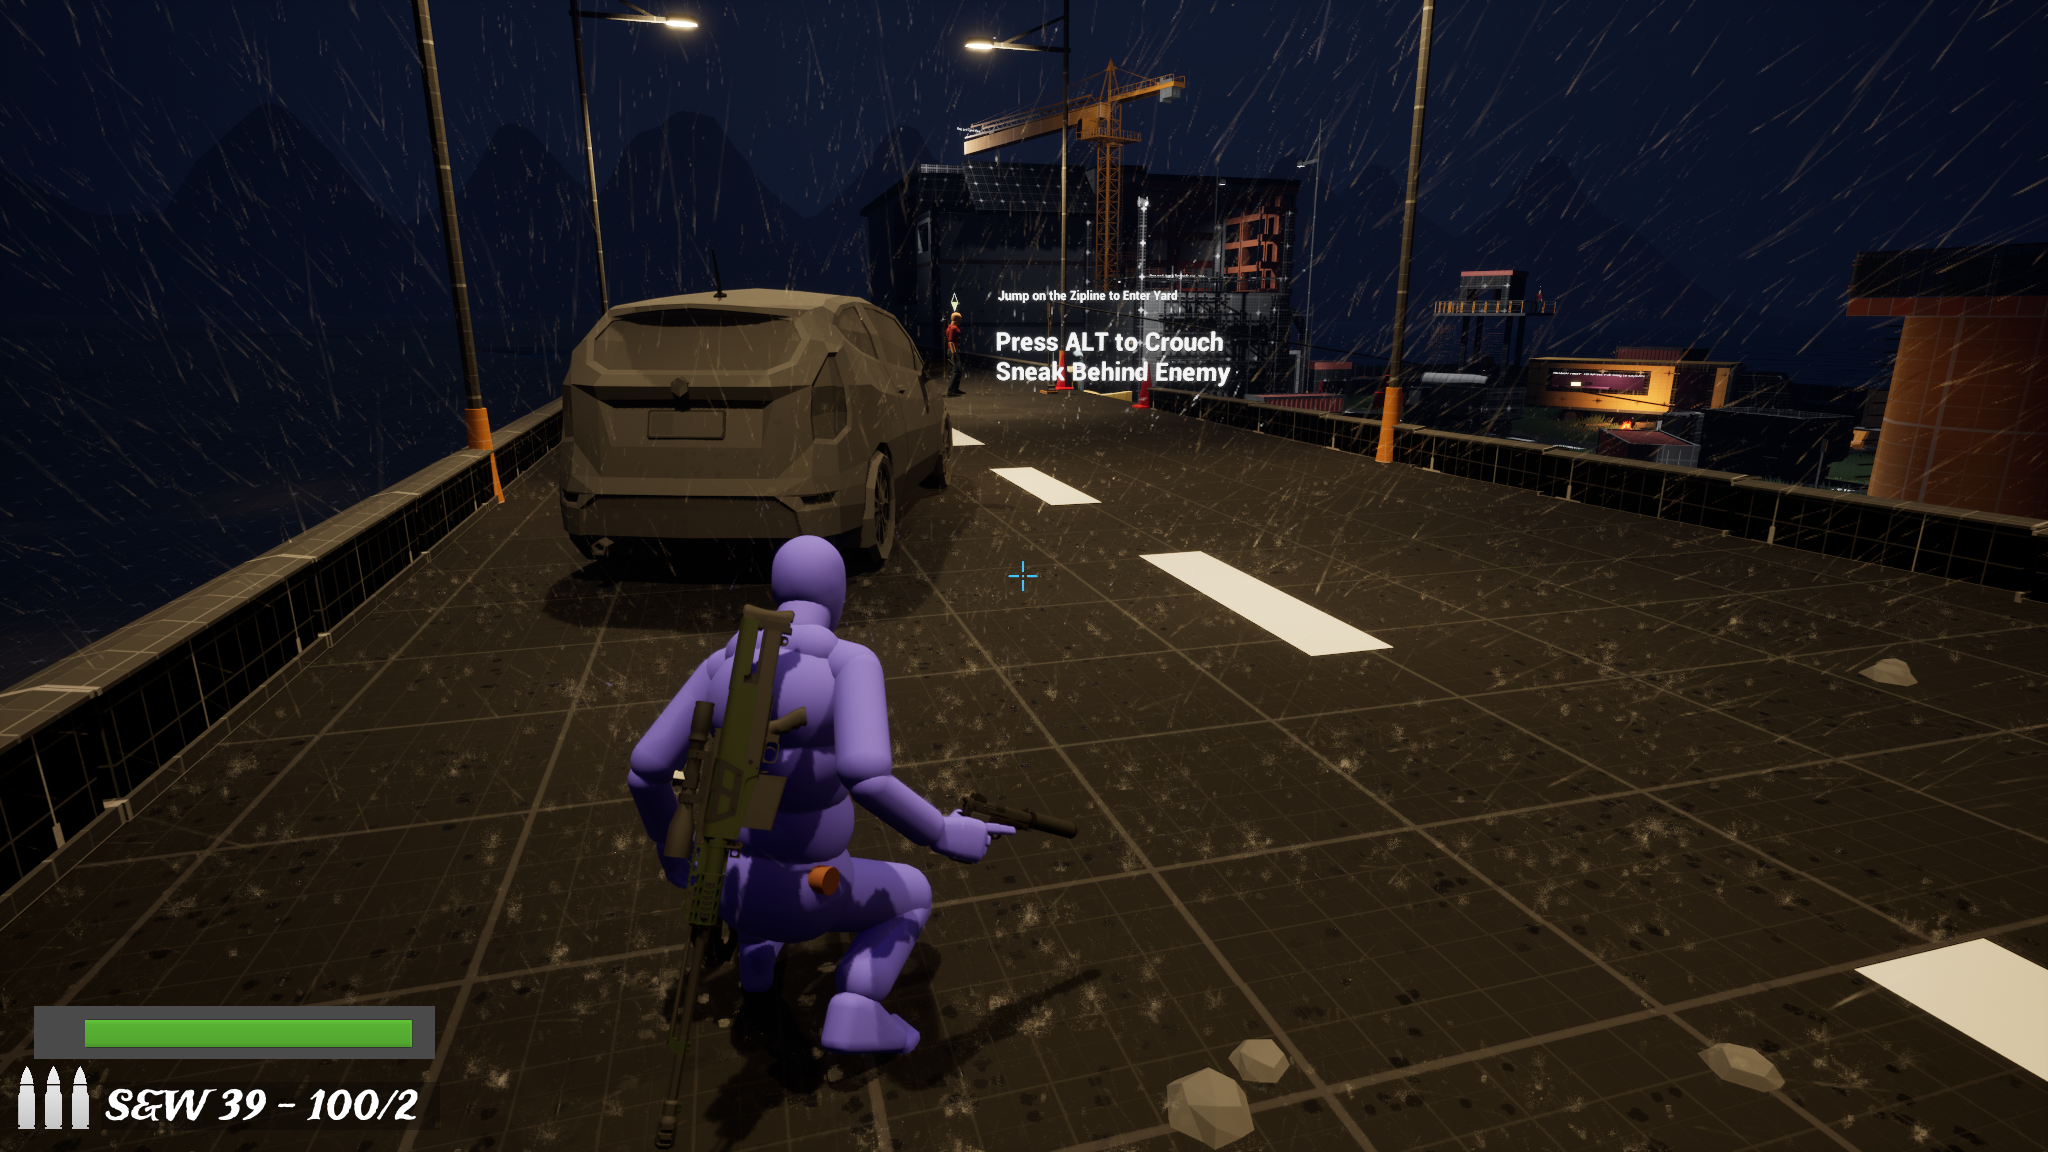
The Site Trailer and Crane are shown immediately. A cutscene zooms into the trailer while the Handler explains the “Fake Accident” evidence objective. Two routes open into the yard.
Fig 3. The Site Trailer and Crane are the brightest points — world design instead of a mini-map guides the player.Fig 4. Parked car forces cover; crouch prompt teaches sneaking. The zipline bypasses the dangerous main gate chokepoint.
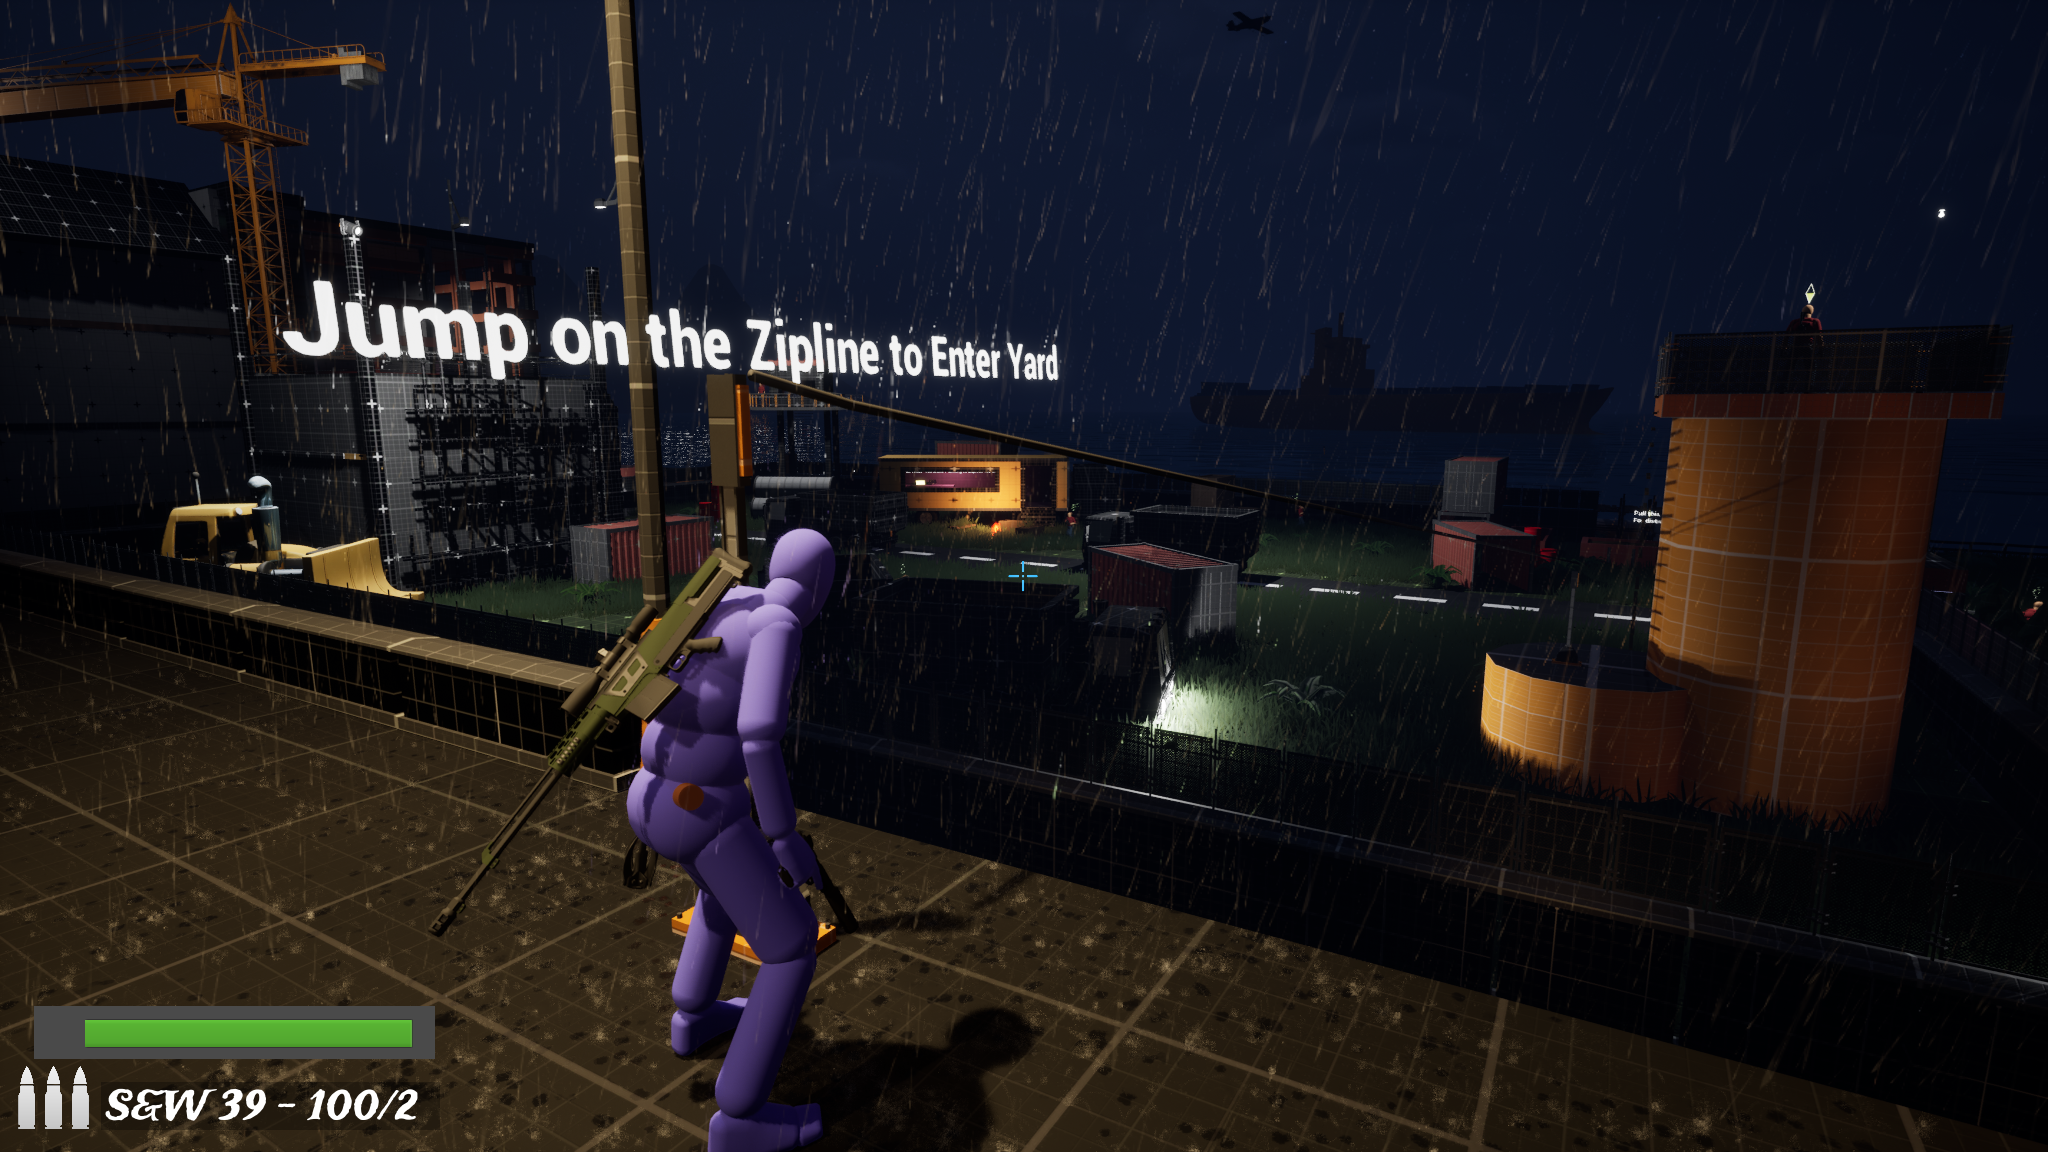
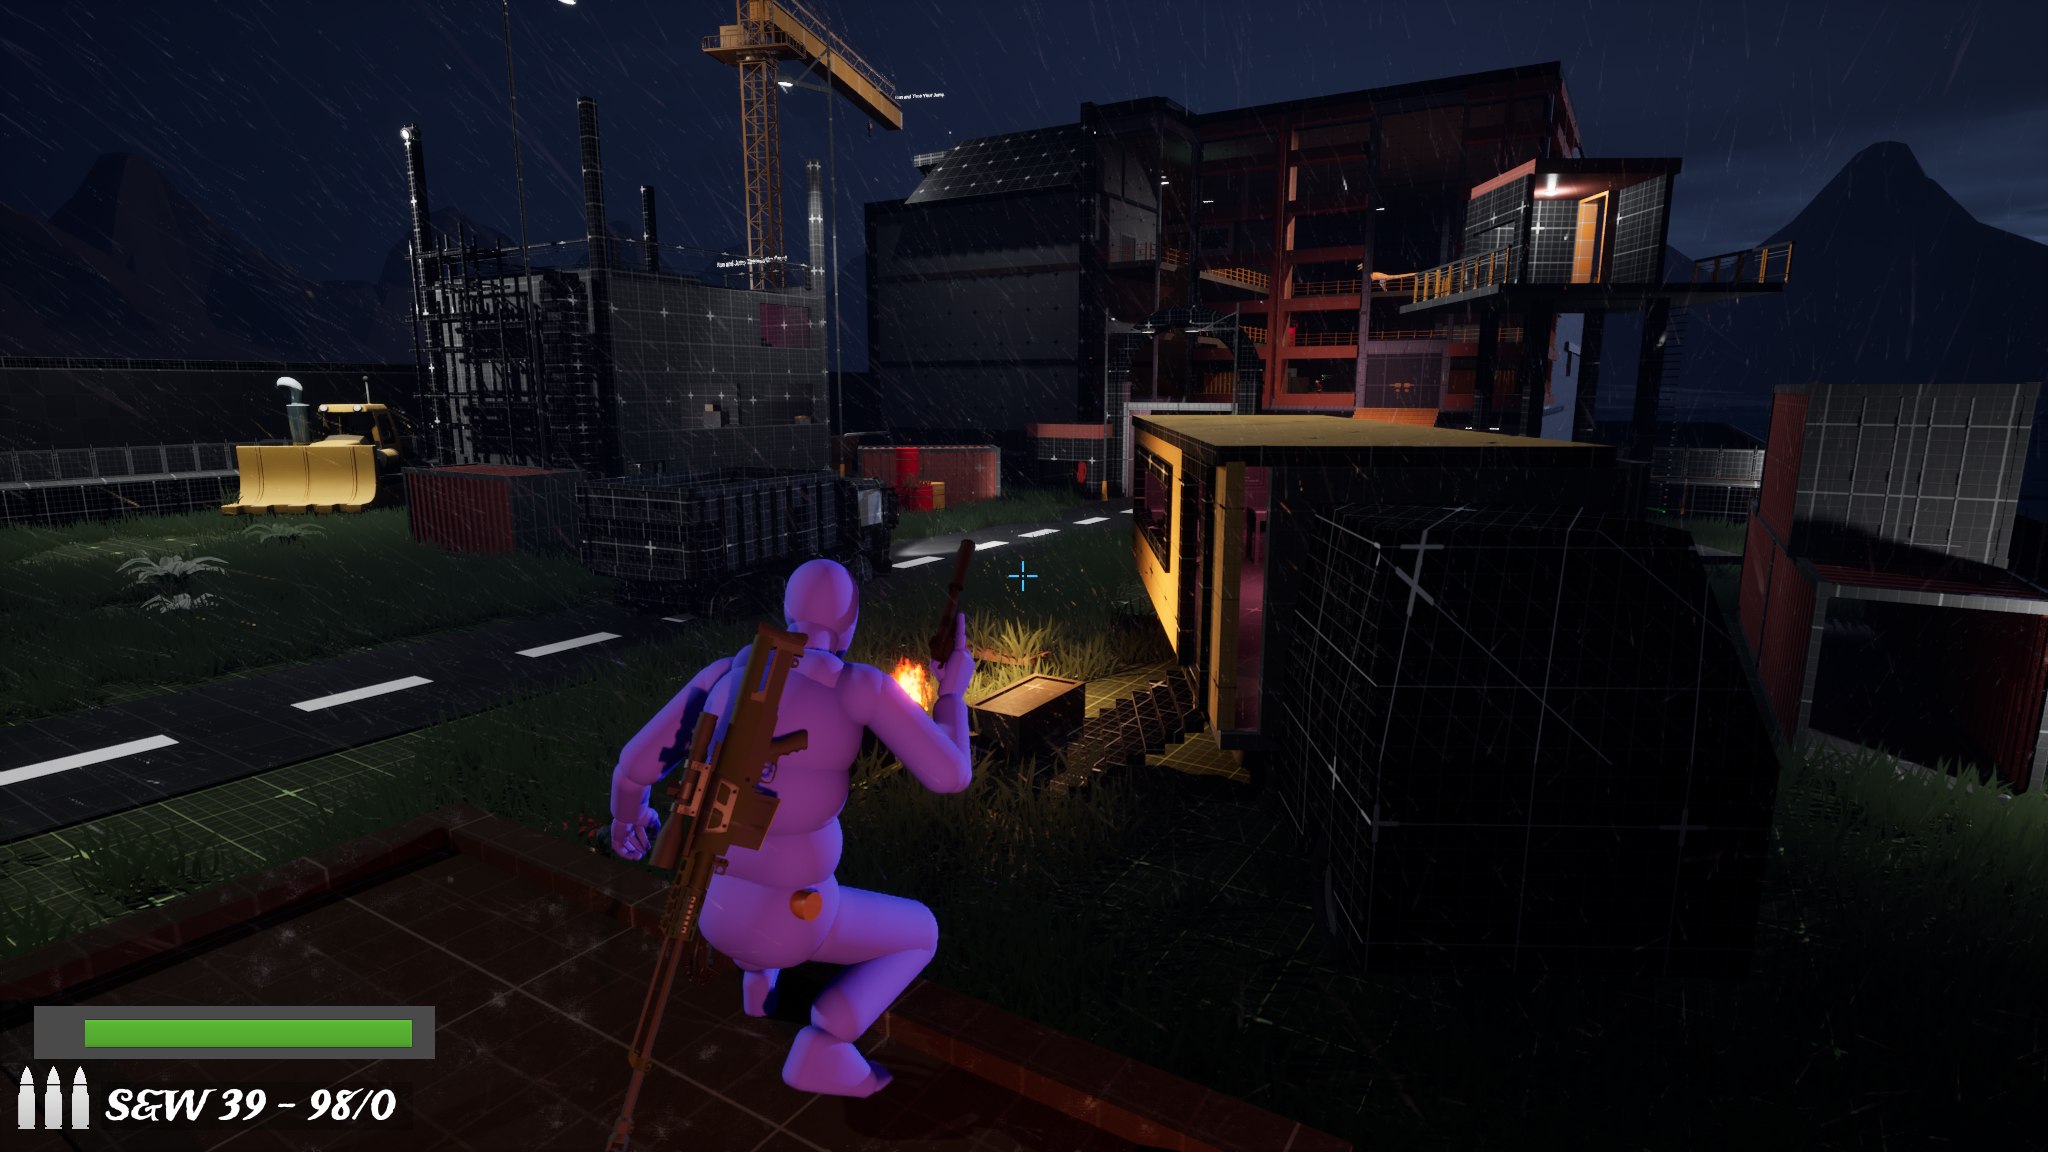
The zipline lands near cement silos with a ladder waiting — naturally guiding the player up the tower for a sniper rifle and full-yard vista.
Fig 5. Zipline drops you at the silos — the best path is upward.Fig 6. Stealth kill on the Watcher, then sniper rifle pickup to neutralize threats from distance.Fig 7. Tower-top vista — spatial reset to observe patrols and plan the route to the Site Trailer.
04
The Yard — Systematic Stealth & Timing
Difficulty: 6/10 · Duration: ~3 min · Stealth / Navigation
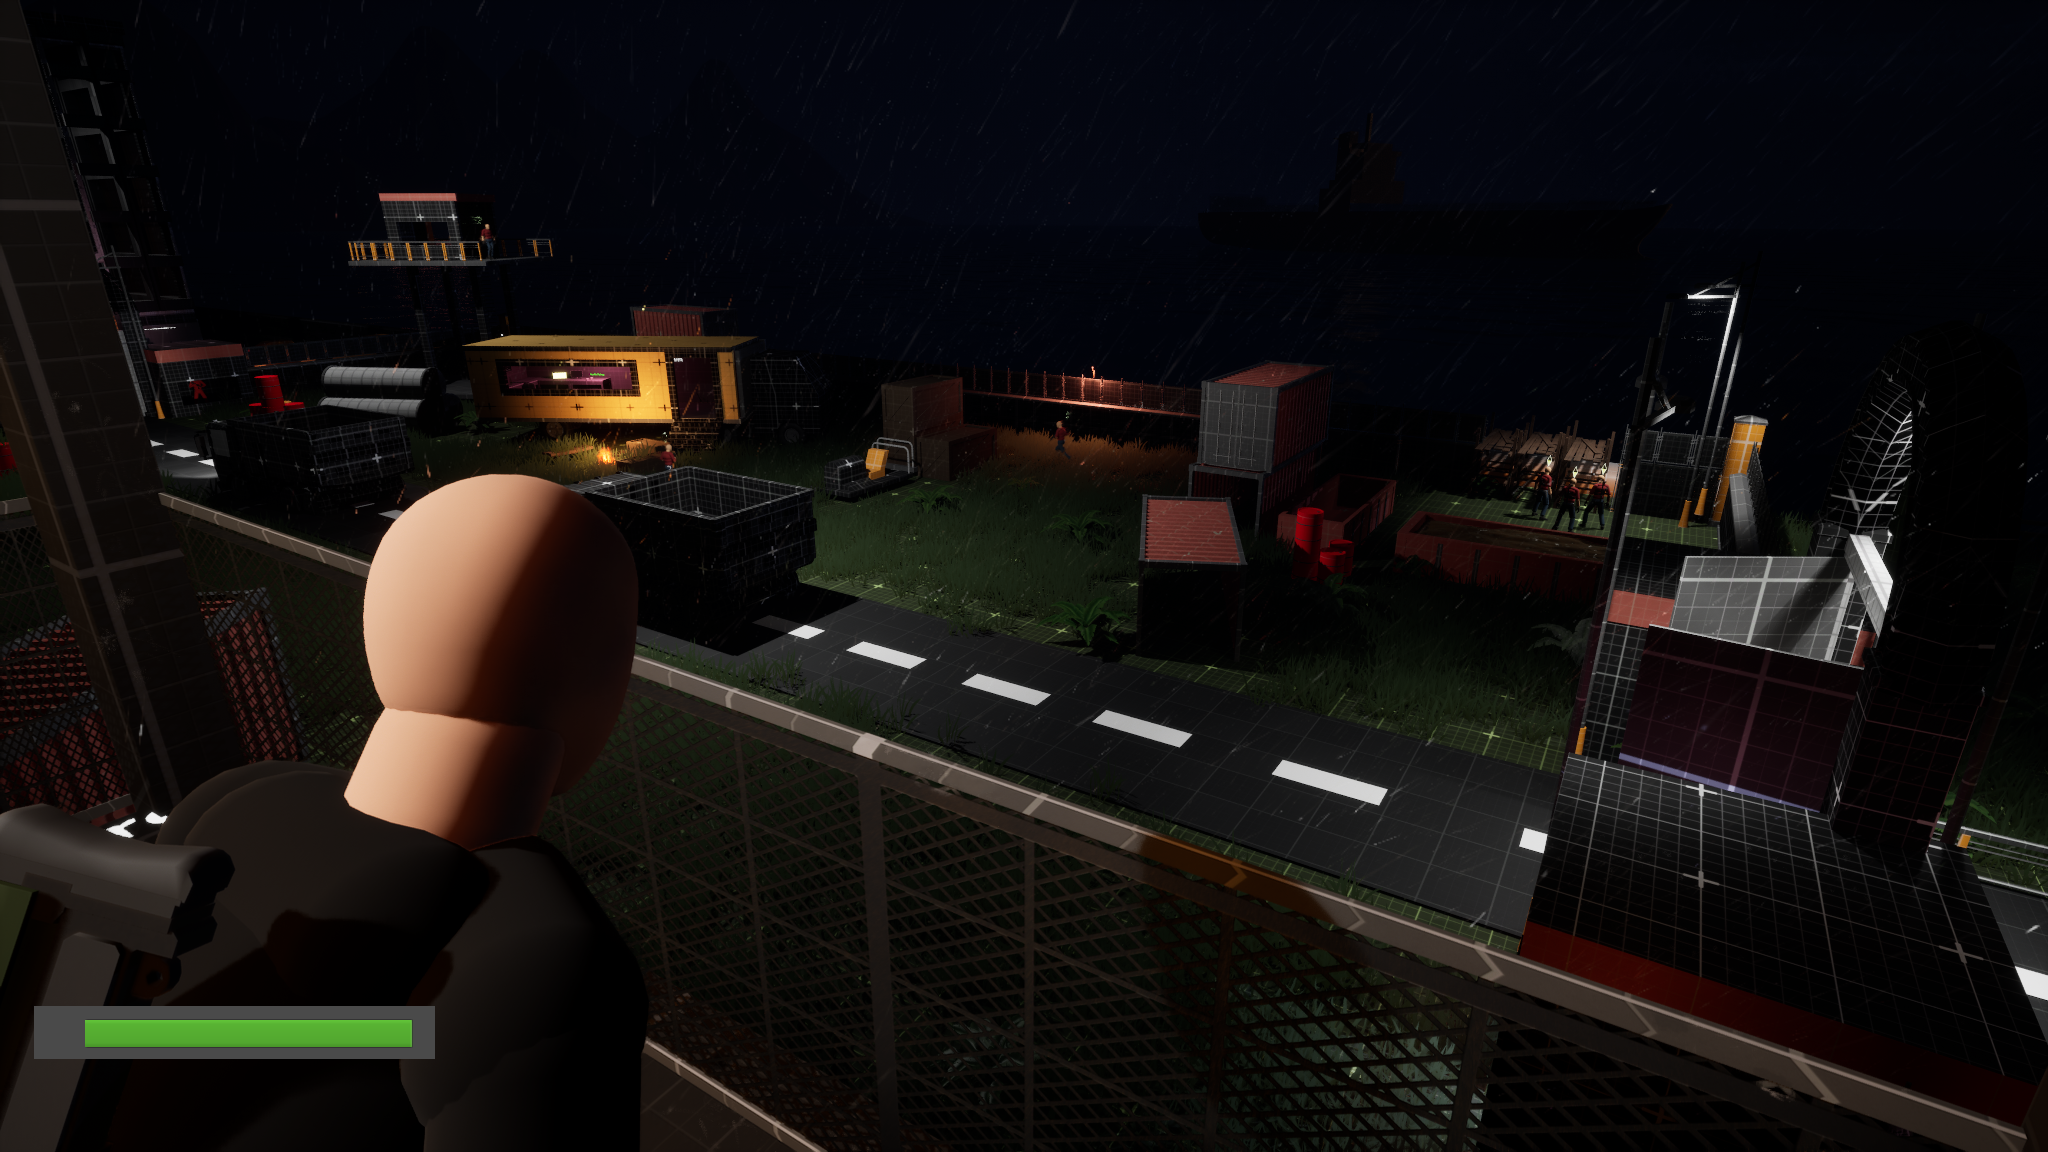
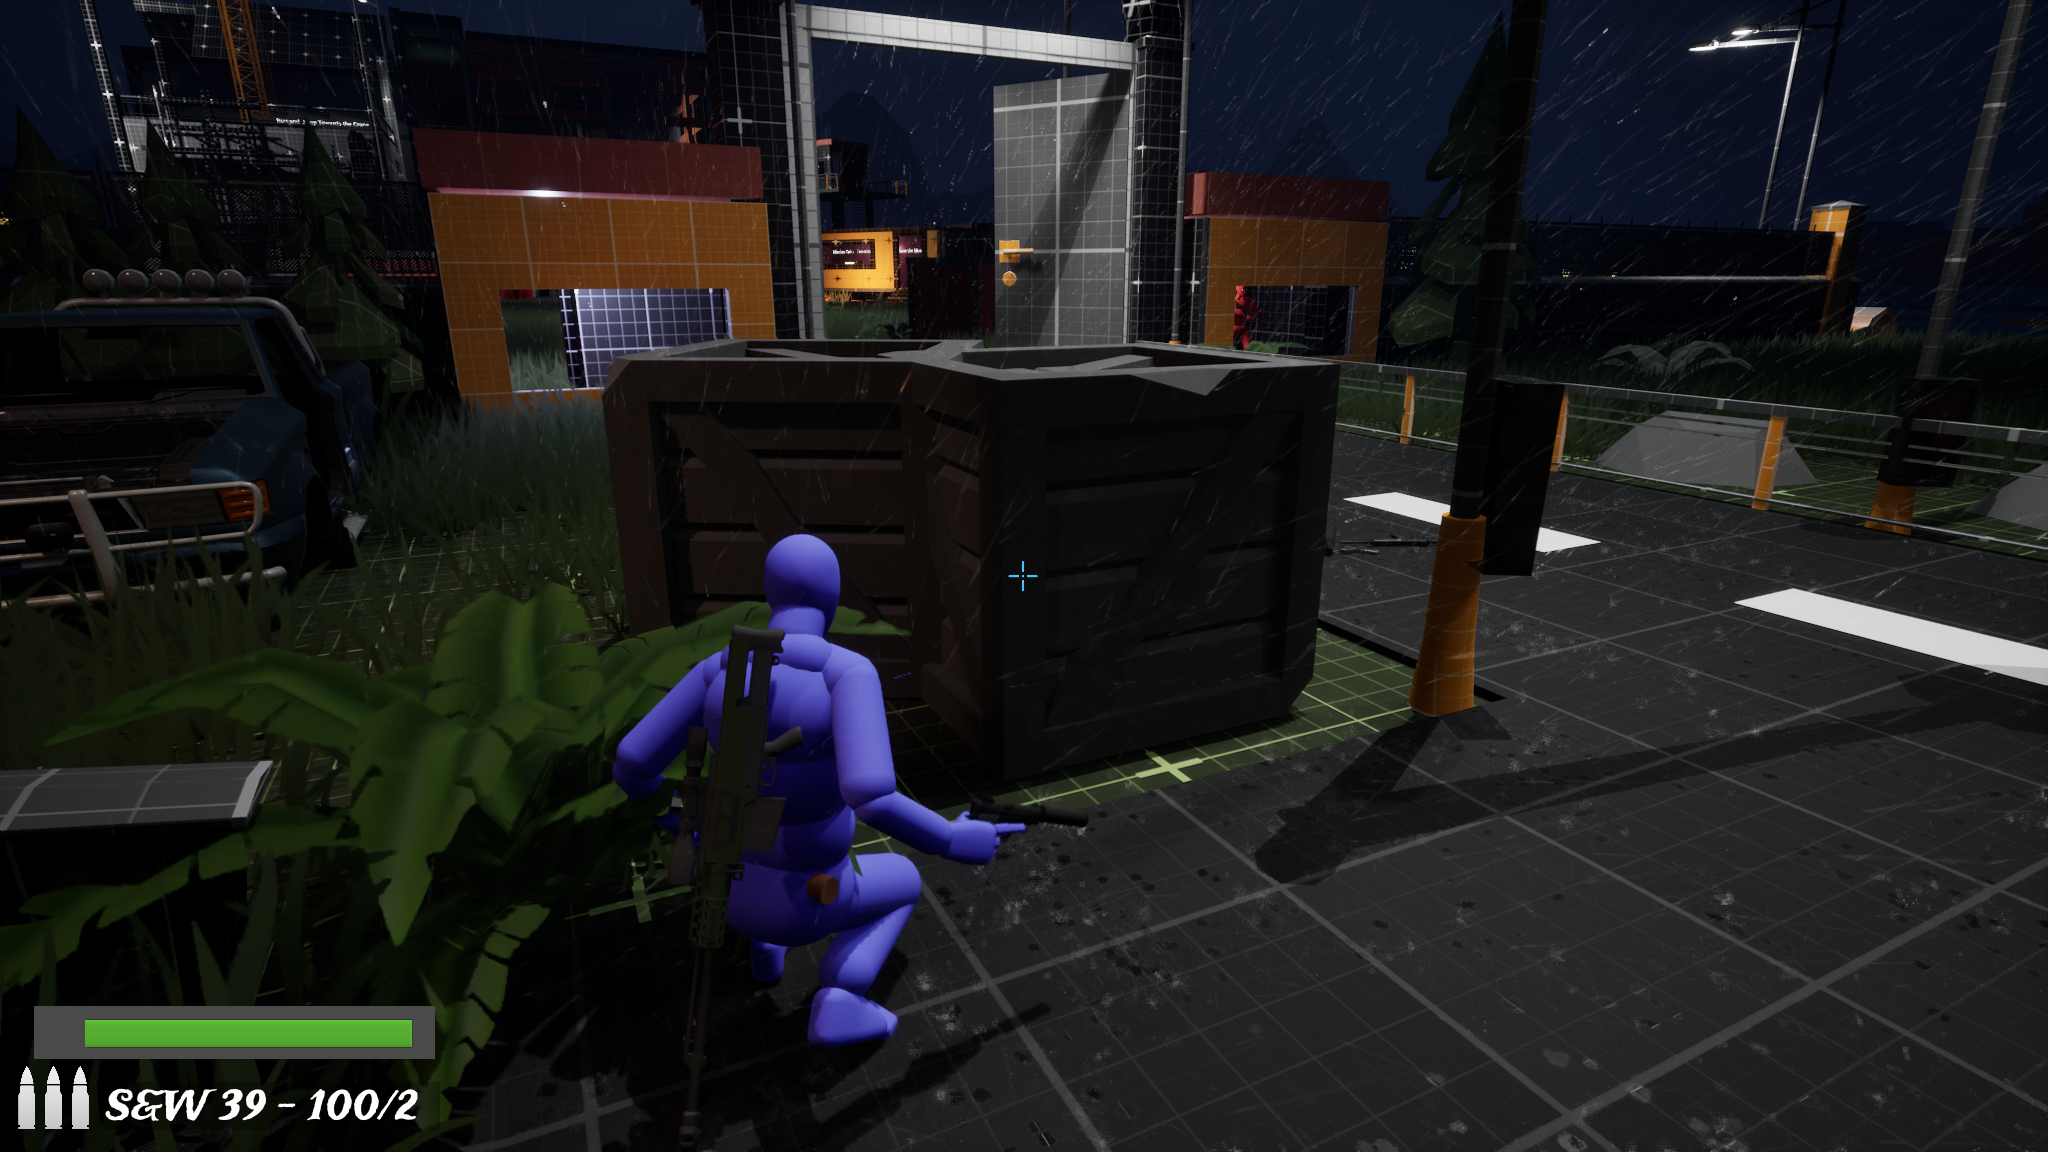
An open arena forcing use of industrial containers to leapfrog between safe zones. Success depends on patrol timing and cover discipline.
Fig 8. Grey crates break Searcher sightlines with multiple paths through the yard.Fig 9. Take Cover lets you plan while glued to geometry near heavy equipment.Fig 10. Final tactical overview before the trailer — Skeleton Building and Crane loom ahead.
05
The Twist — Narrative Pivot & Objective Shift
Difficulty: 2/10 · Duration: ~1 min · Story / Objective Update
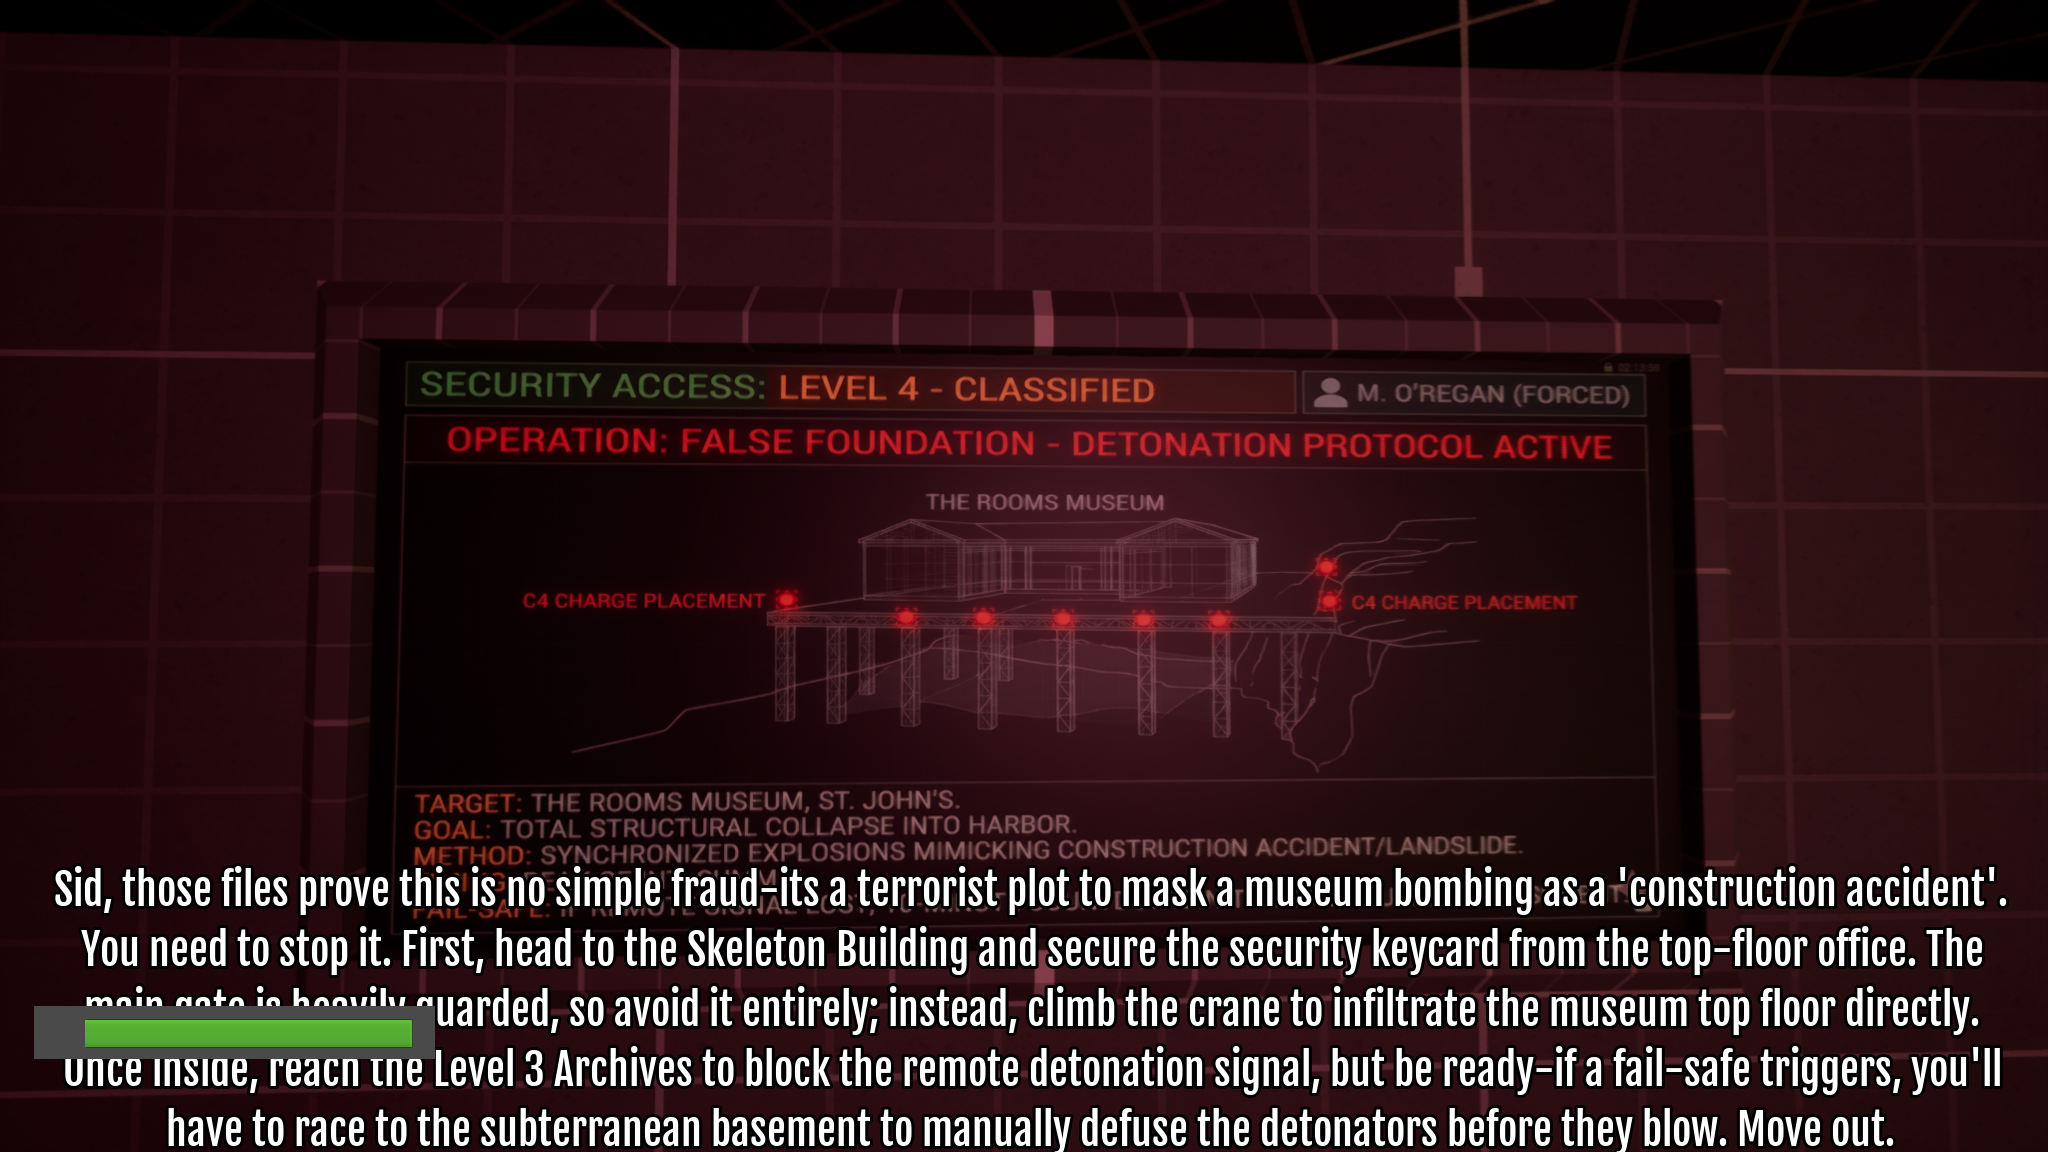
Hacking the Site Trailer terminal reveals the bombing plot disguised as a construction accident. The detonation protocol instantly raises the stakes.
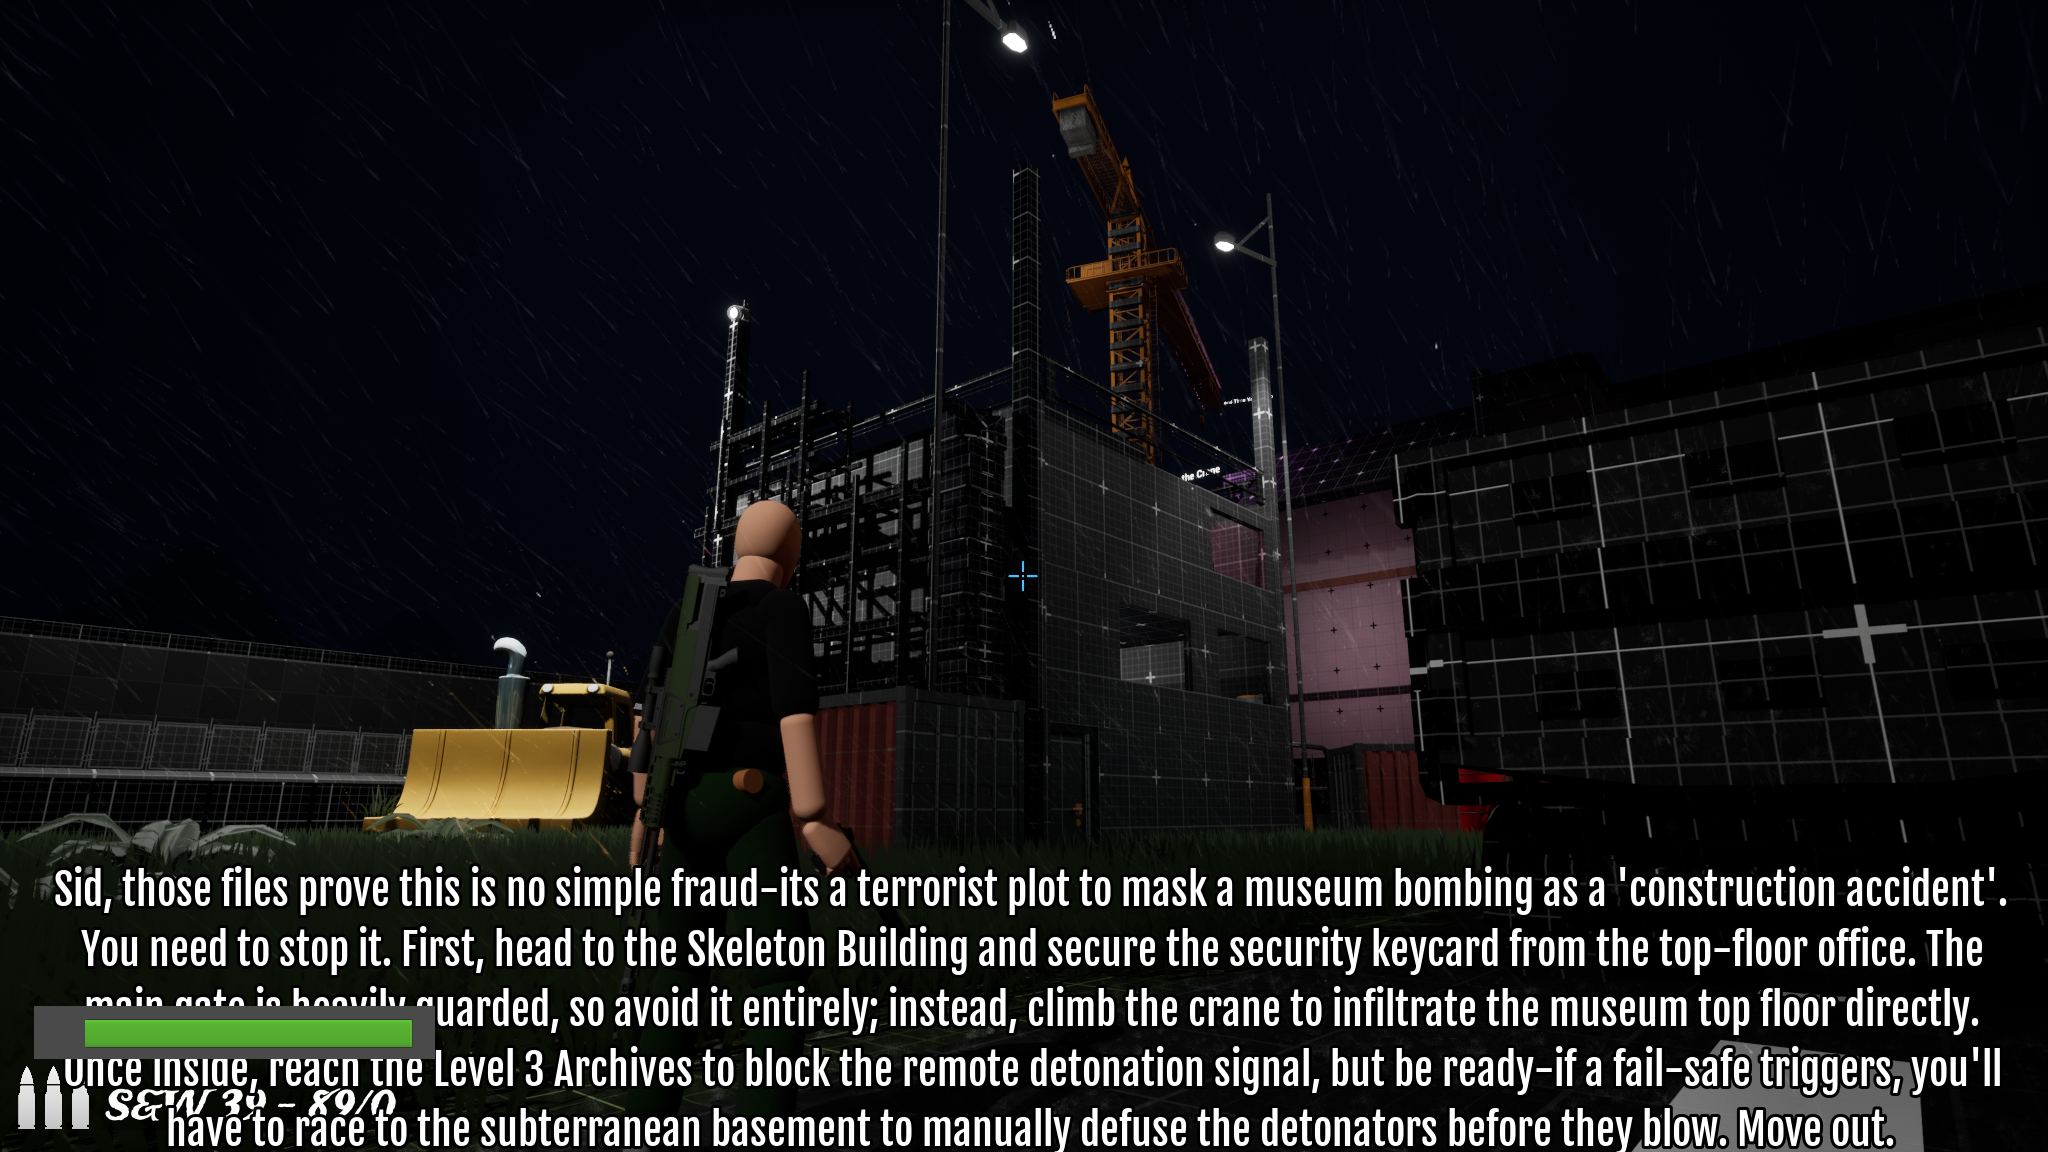
Fig 11. Terminal shows The Rooms blueprint with C4 markers — life-or-death stakes without cutscenes.Fig 12. Spatial foreshadowing frames the Skeleton Building and yellow Crane as next landmarks.
06
The Vertical Path — From Skeleton to Museum
Difficulty: 7/10 · Duration: ~4 min · Traversal / Stealth
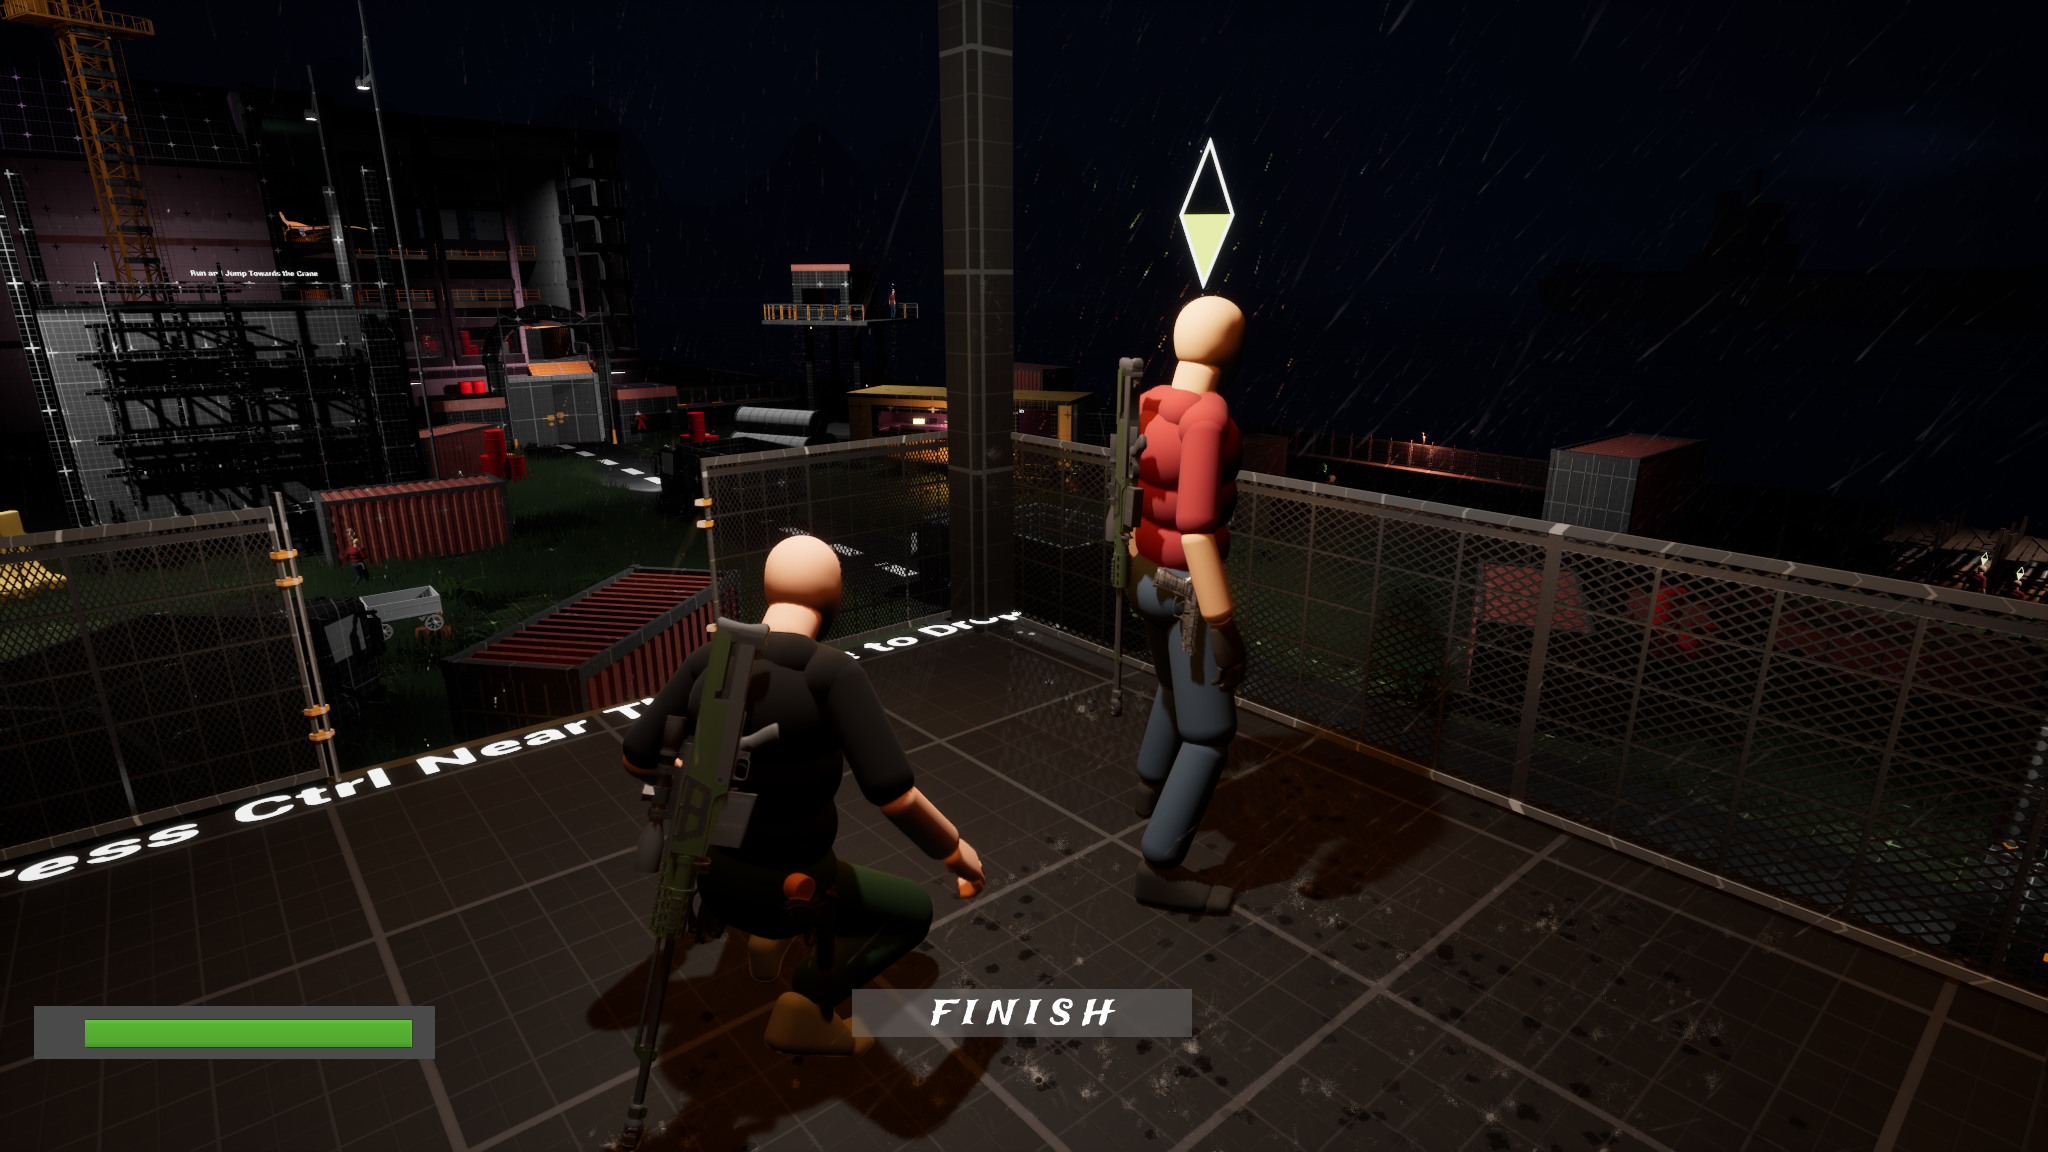
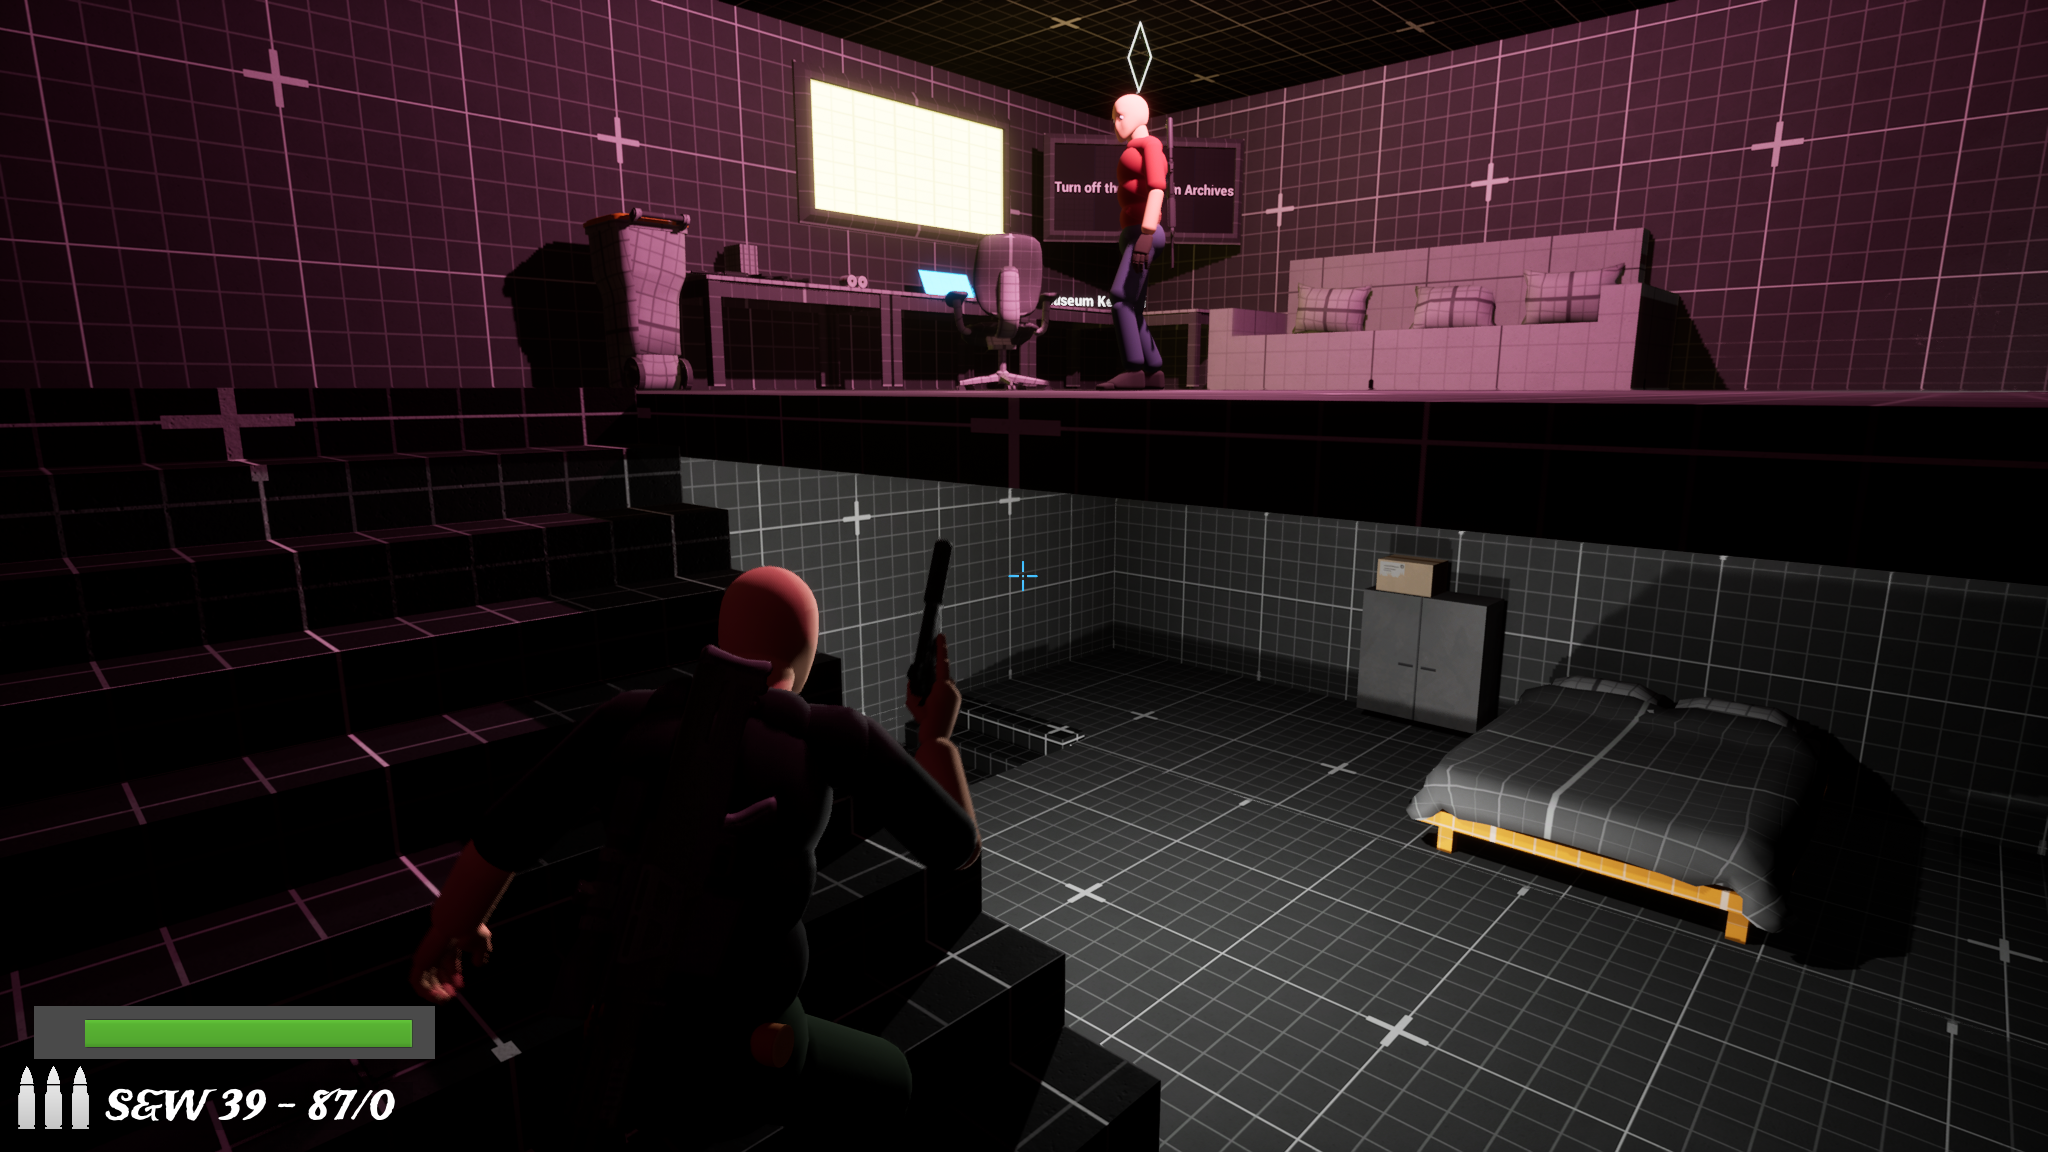
Sid infiltrates the Skeleton Building for the museum keycard, crosses the wind-swept crane arm, and jumps onto the museum roof.
Fig 13. TV sound cue warns of an enemy — Museum Keycard secured in the foreman’s office.Fig 14. Terrace frames the yellow crane as the golden path to the museum roof.
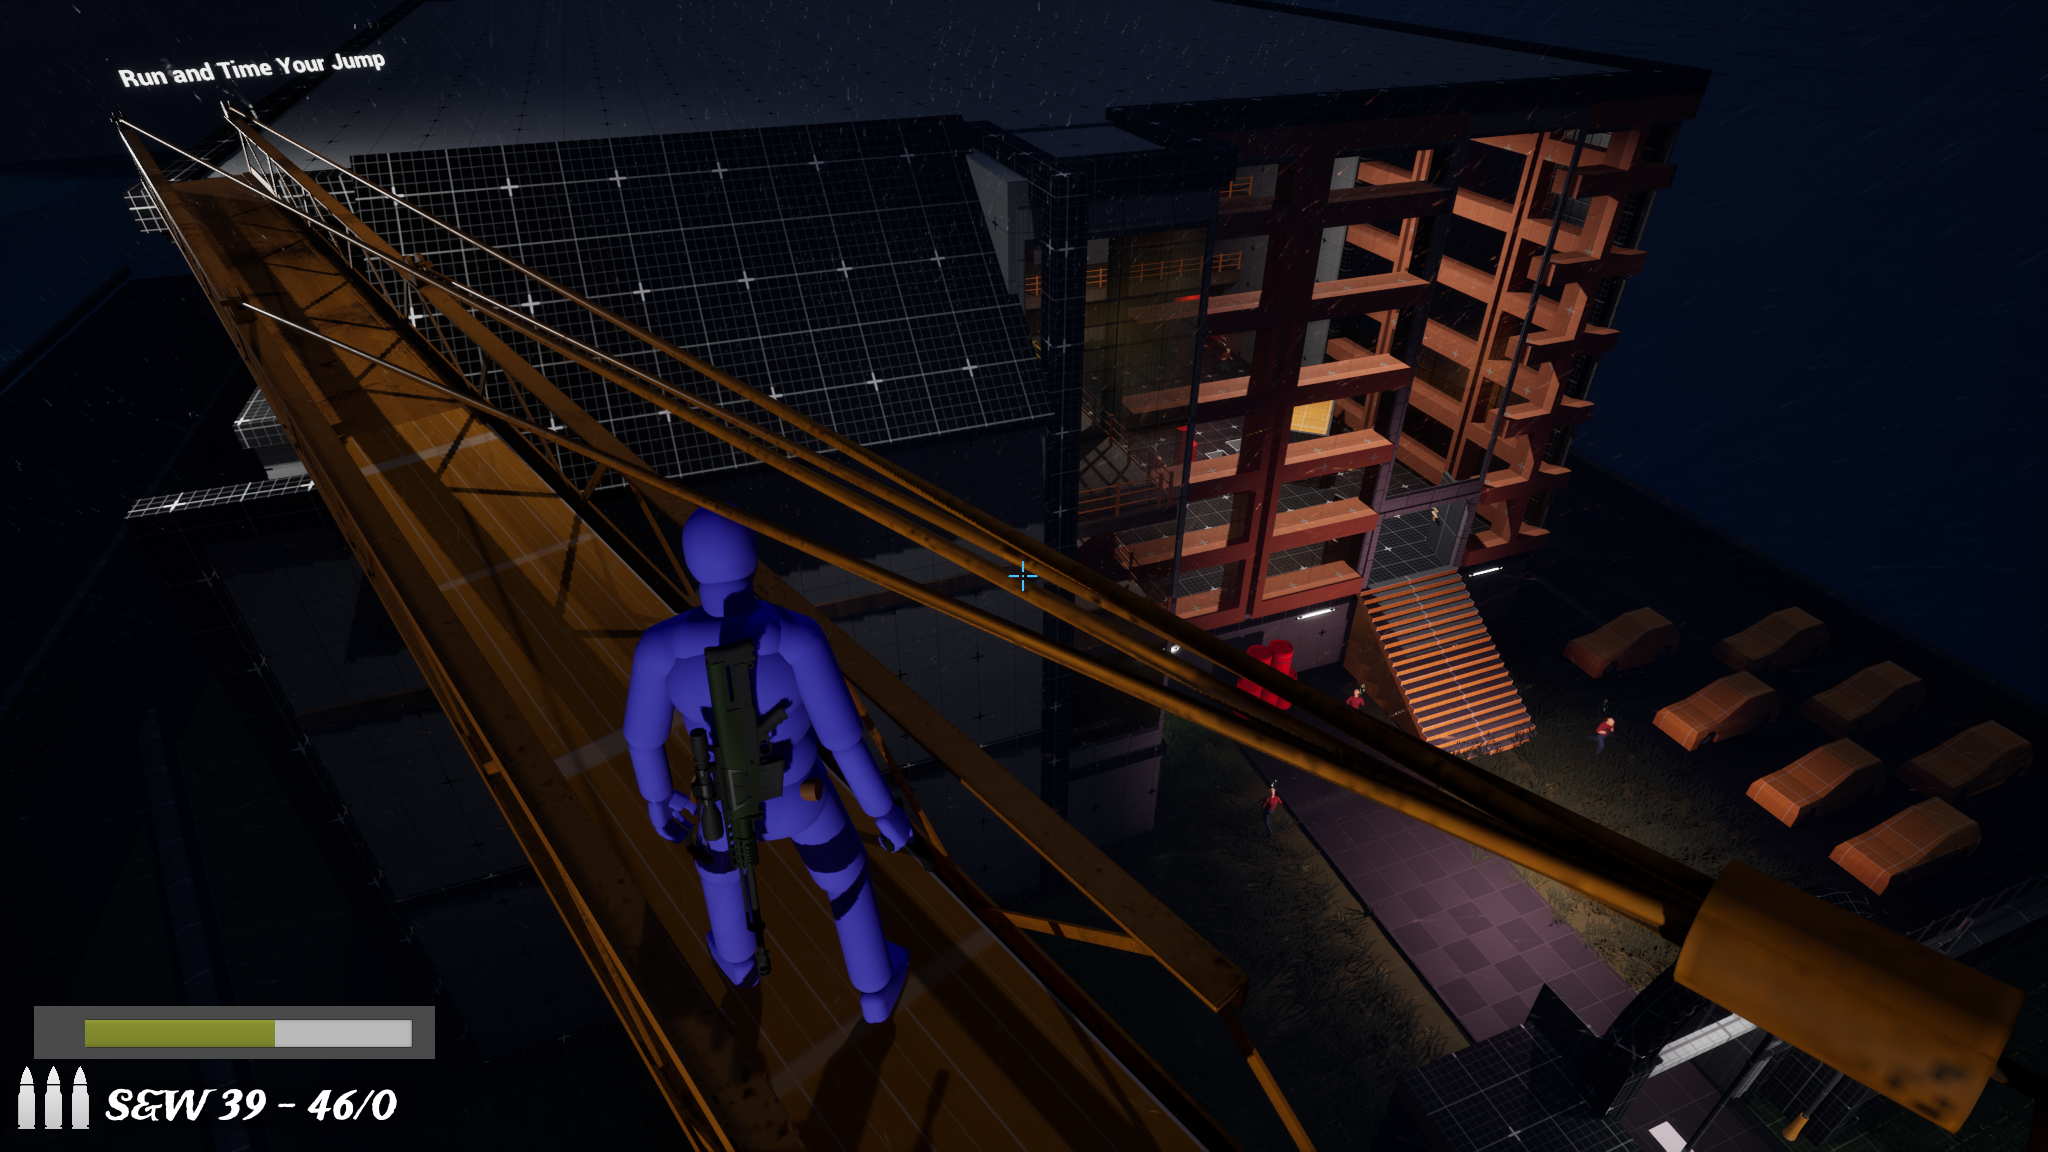
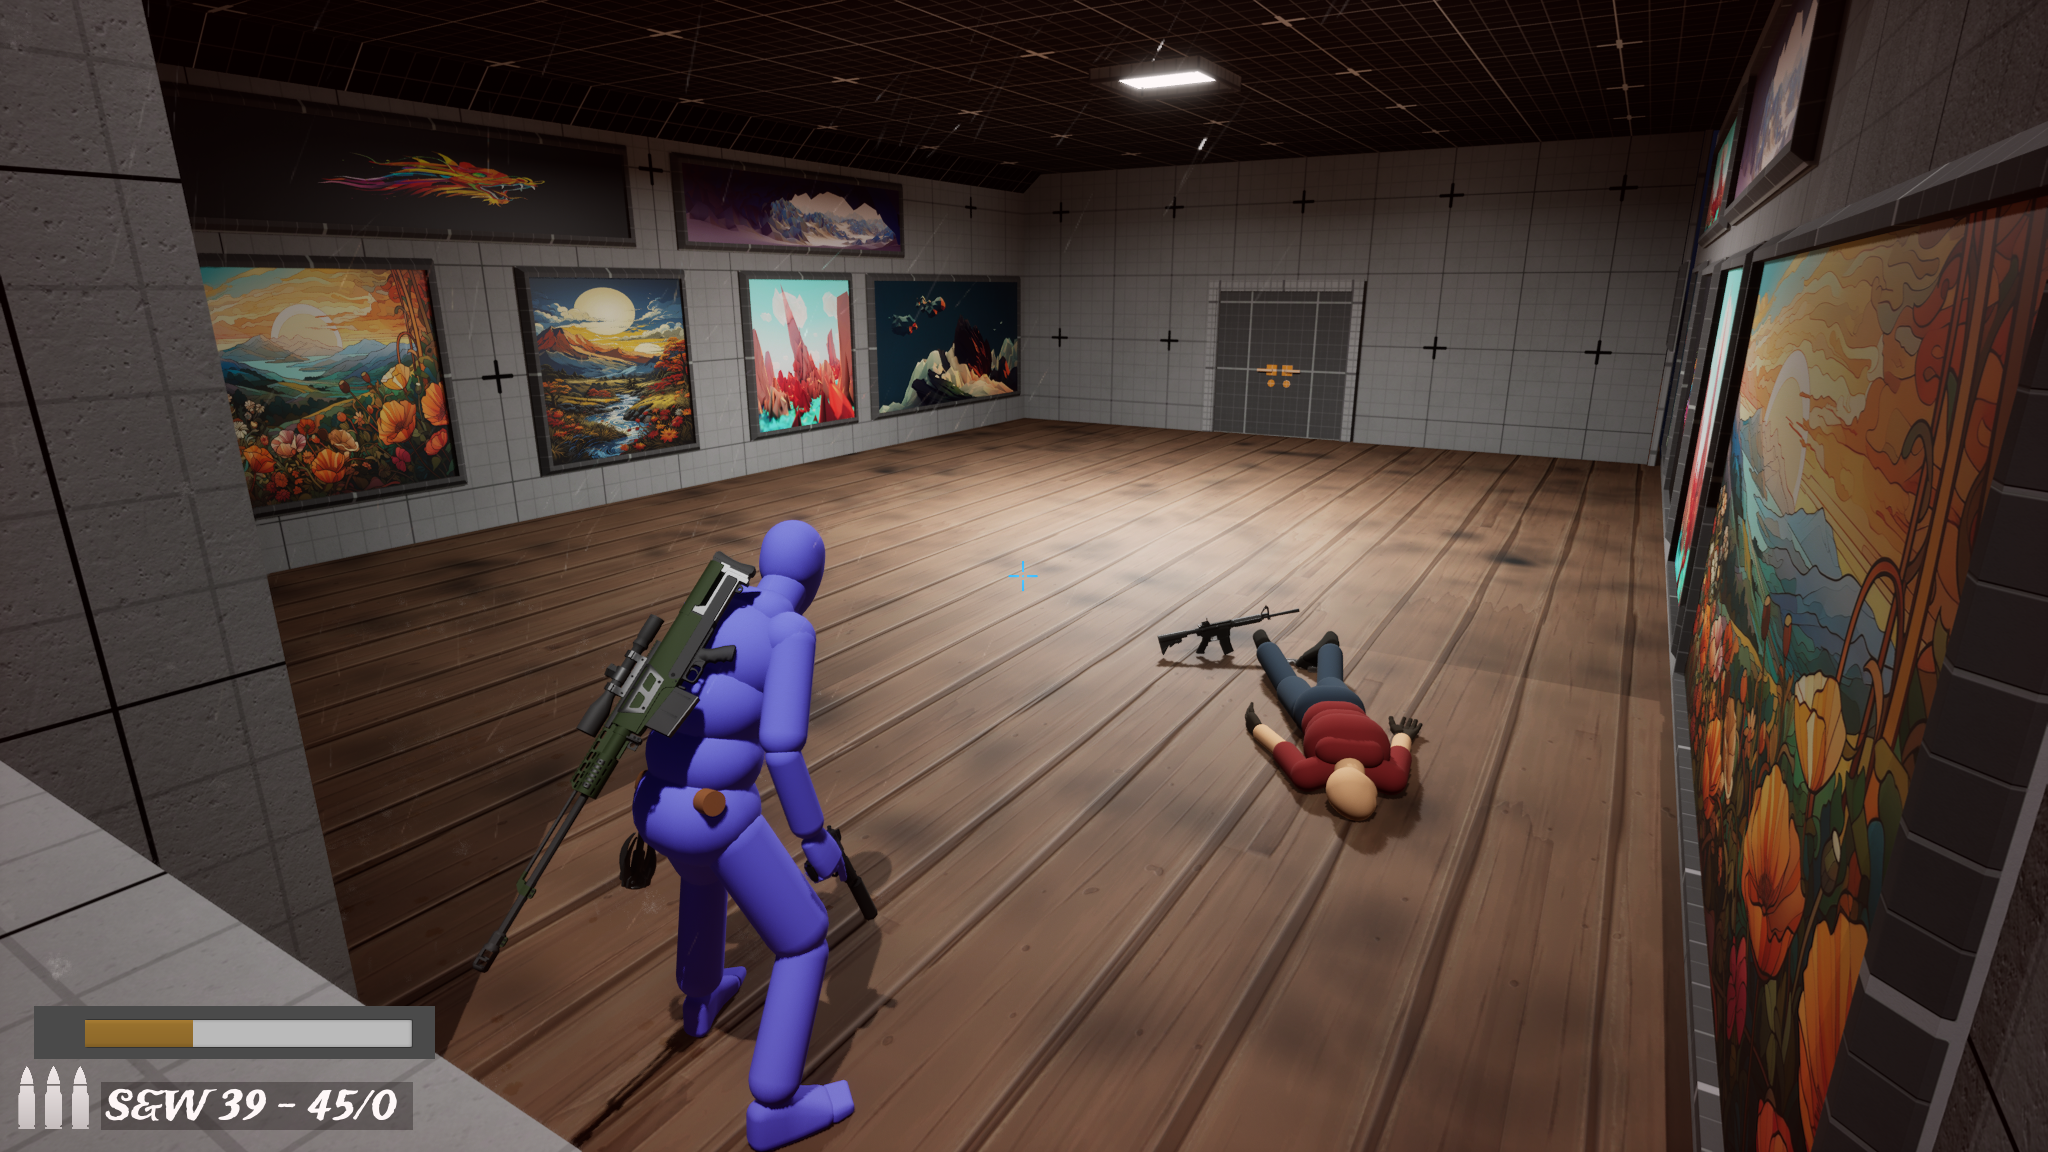
Fig 15. Crane arm introduces high-altitude winds — one last yard vista before the museum interior.Fig 16. Top-floor chokepoint with whistling audio cue — bright gallery provides a safe room before the Archives descent.
07
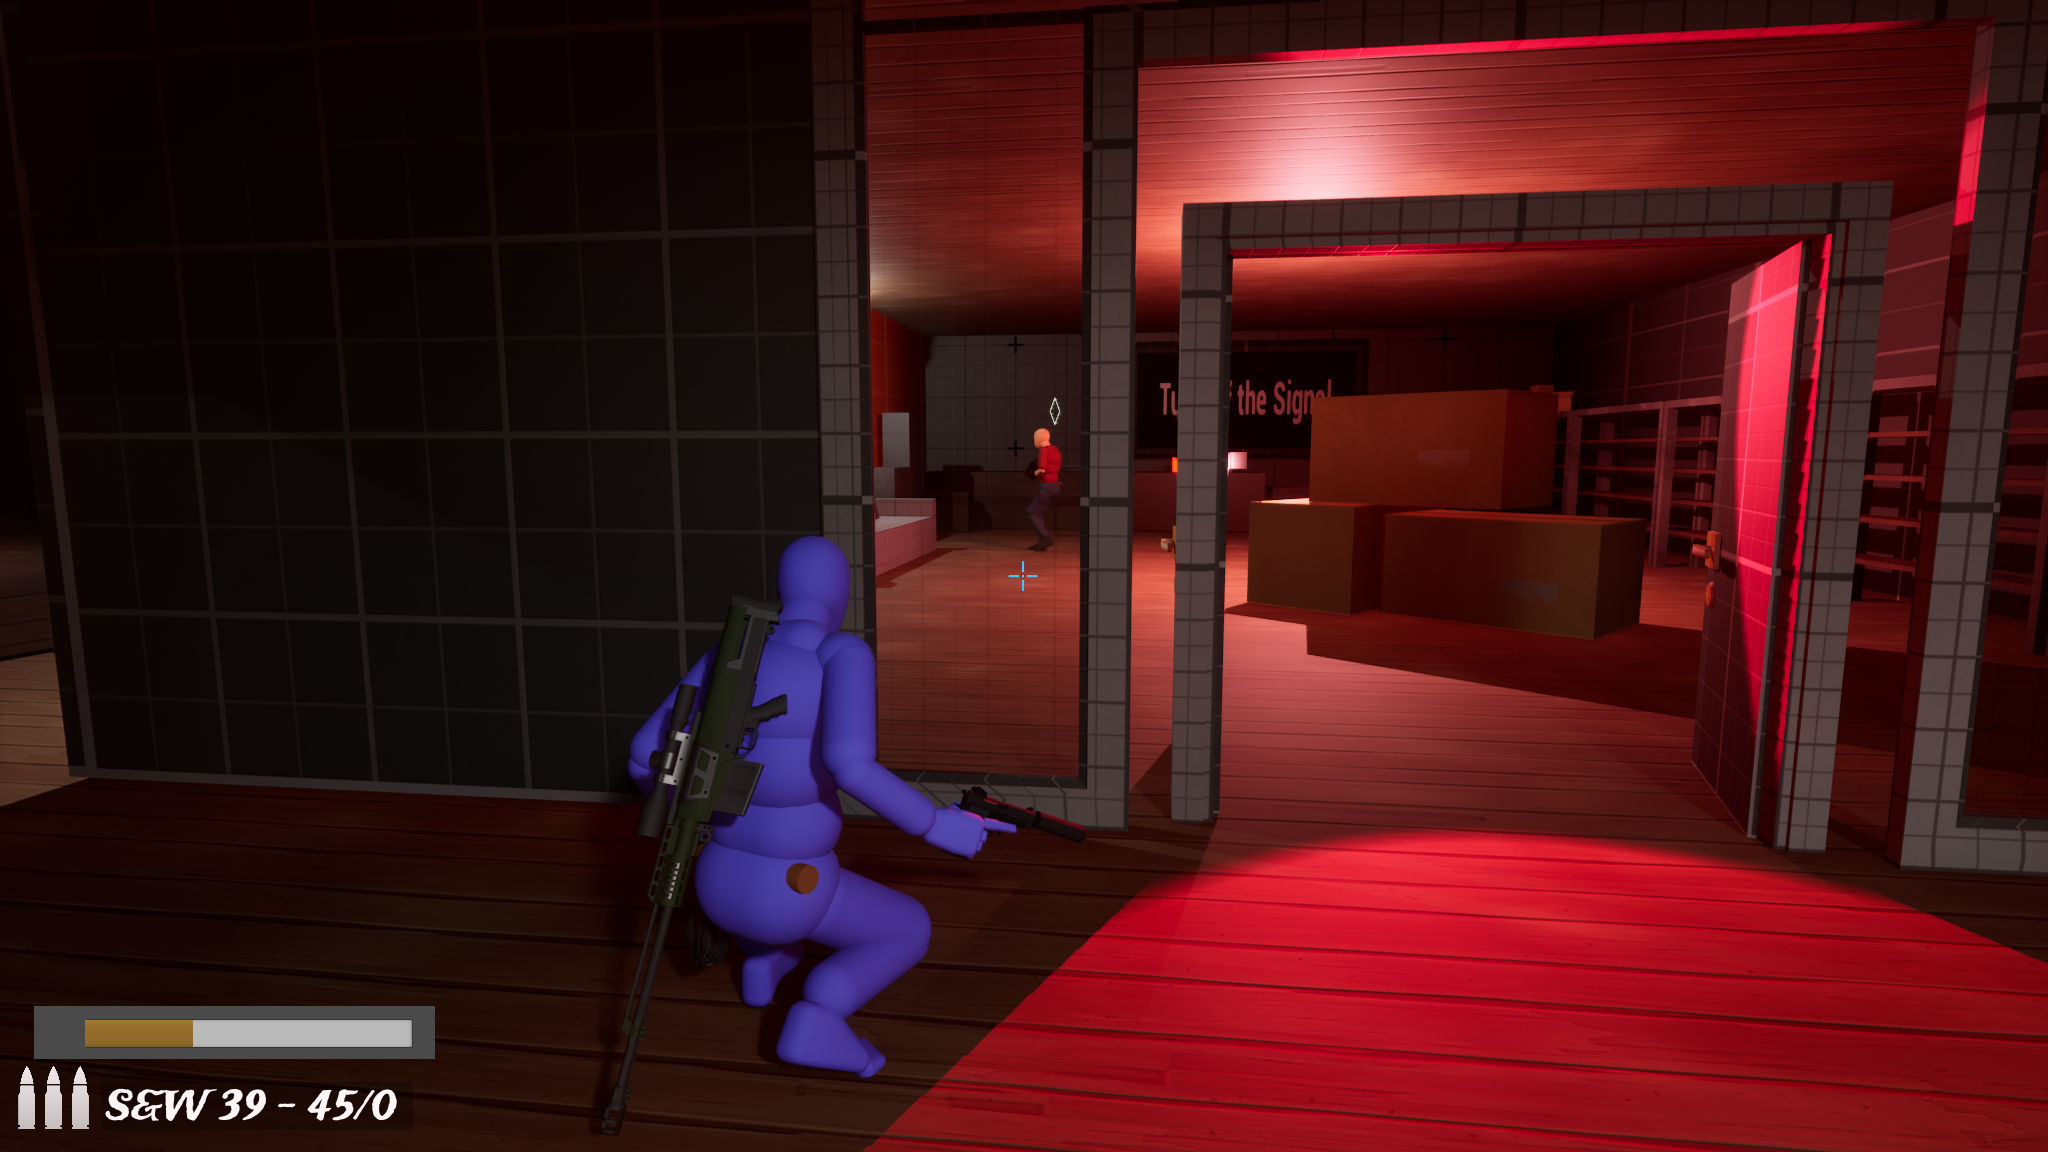
The Archives & Bomb Dash — Climax
Difficulty: 9/10 · Duration: ~5 min · Combat / Puzzle
Blocking the signal triggers red-alert state and the 10-minute countdown — the level’s difficulty peak at 9/10.
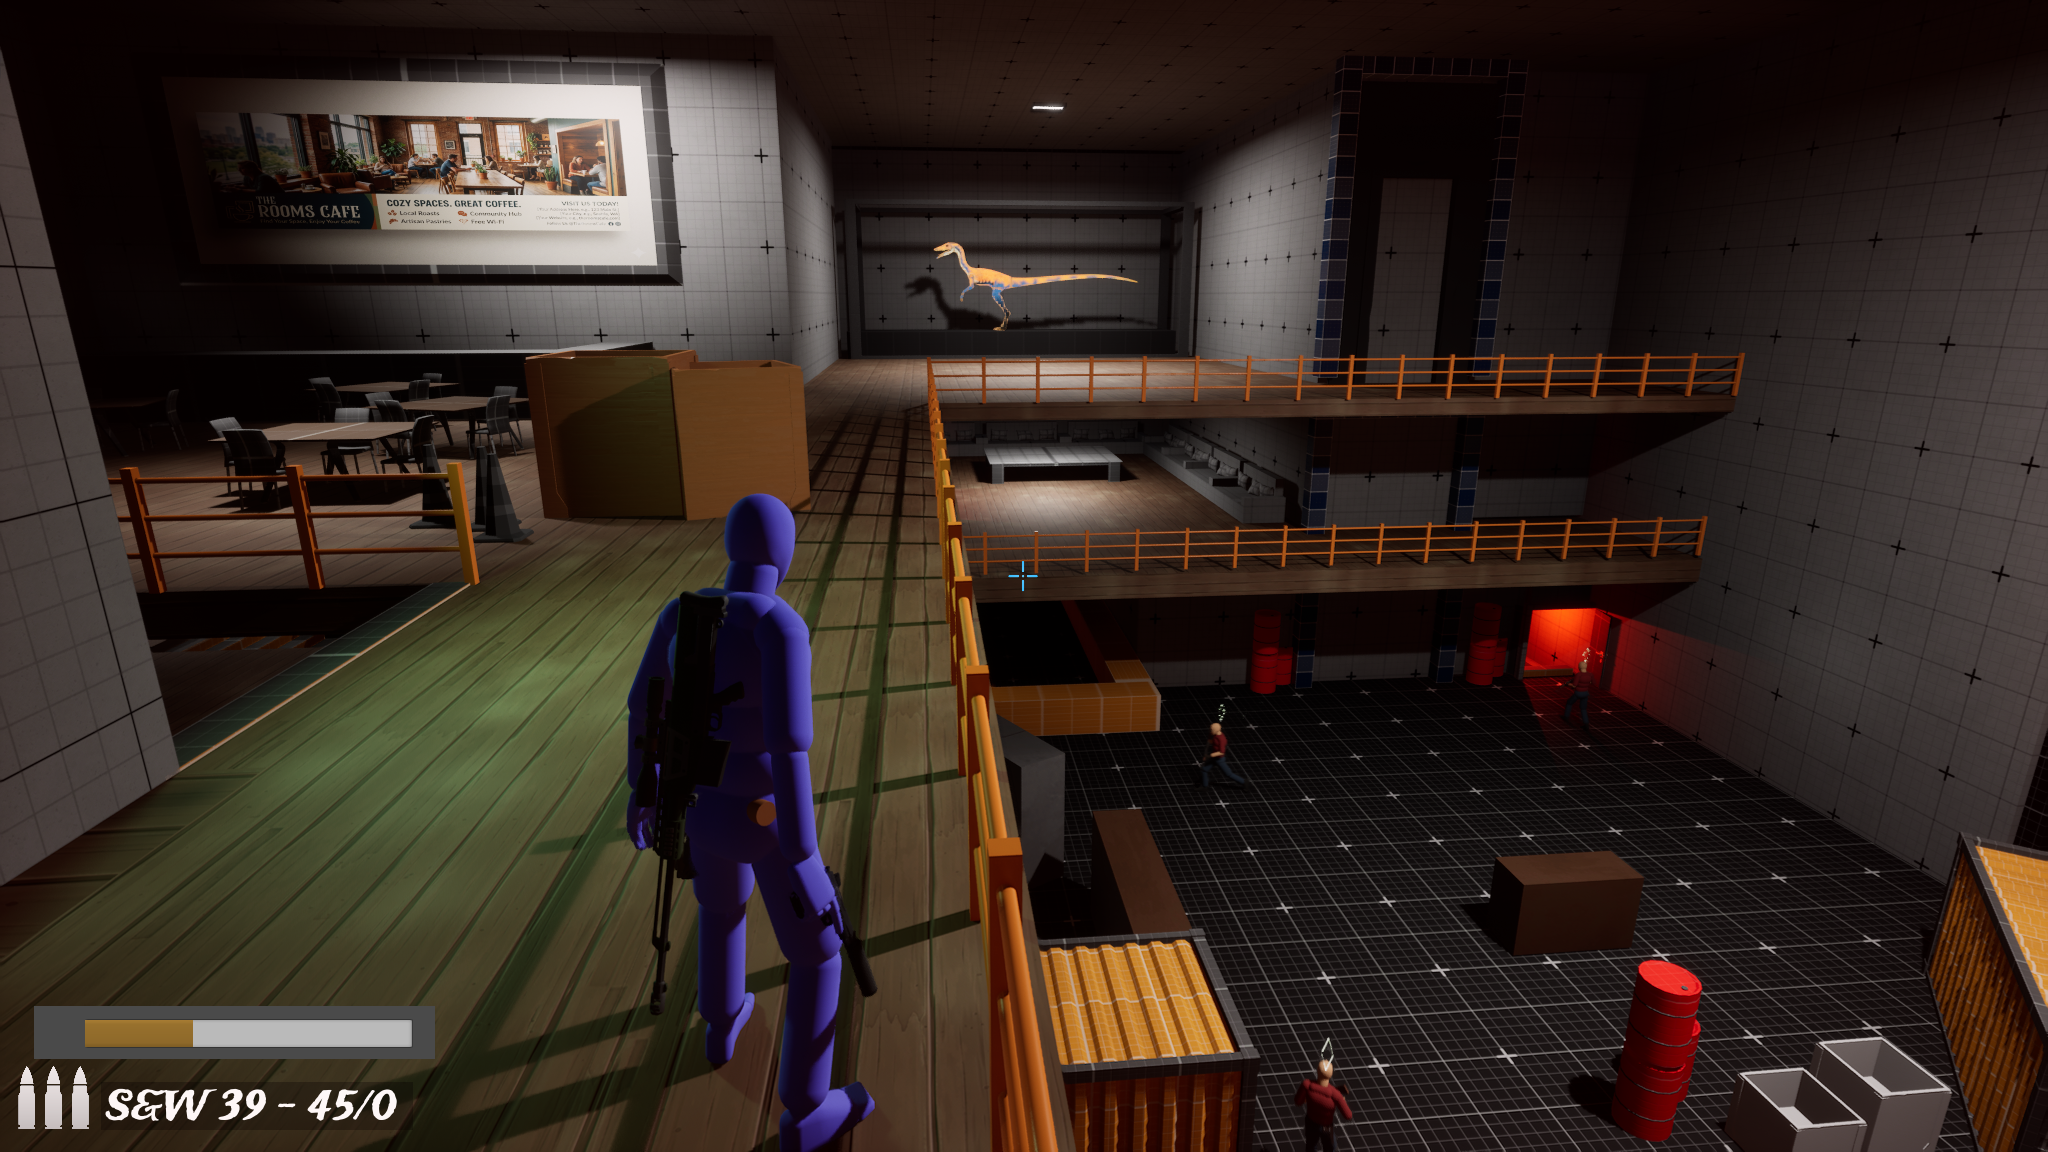
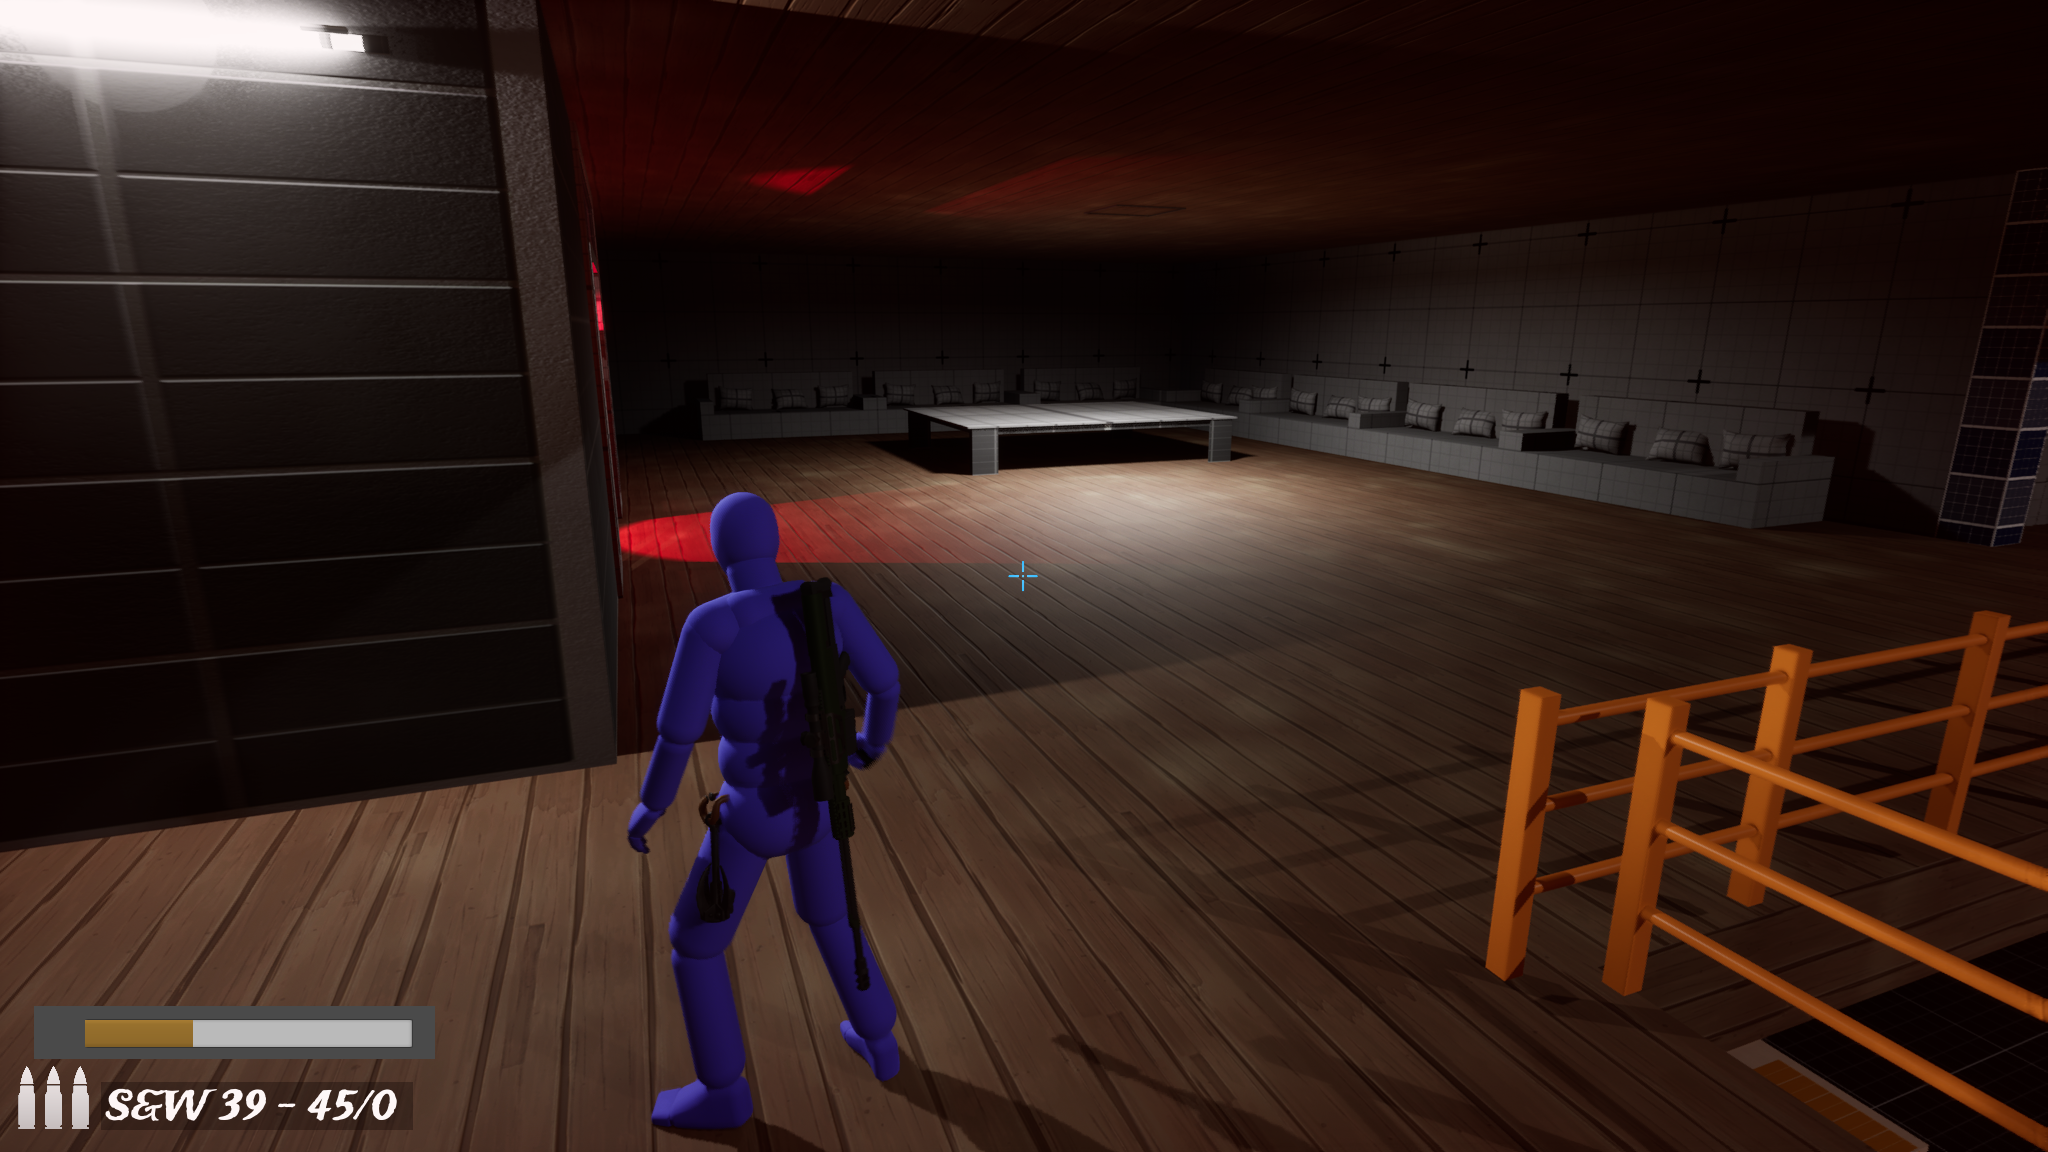
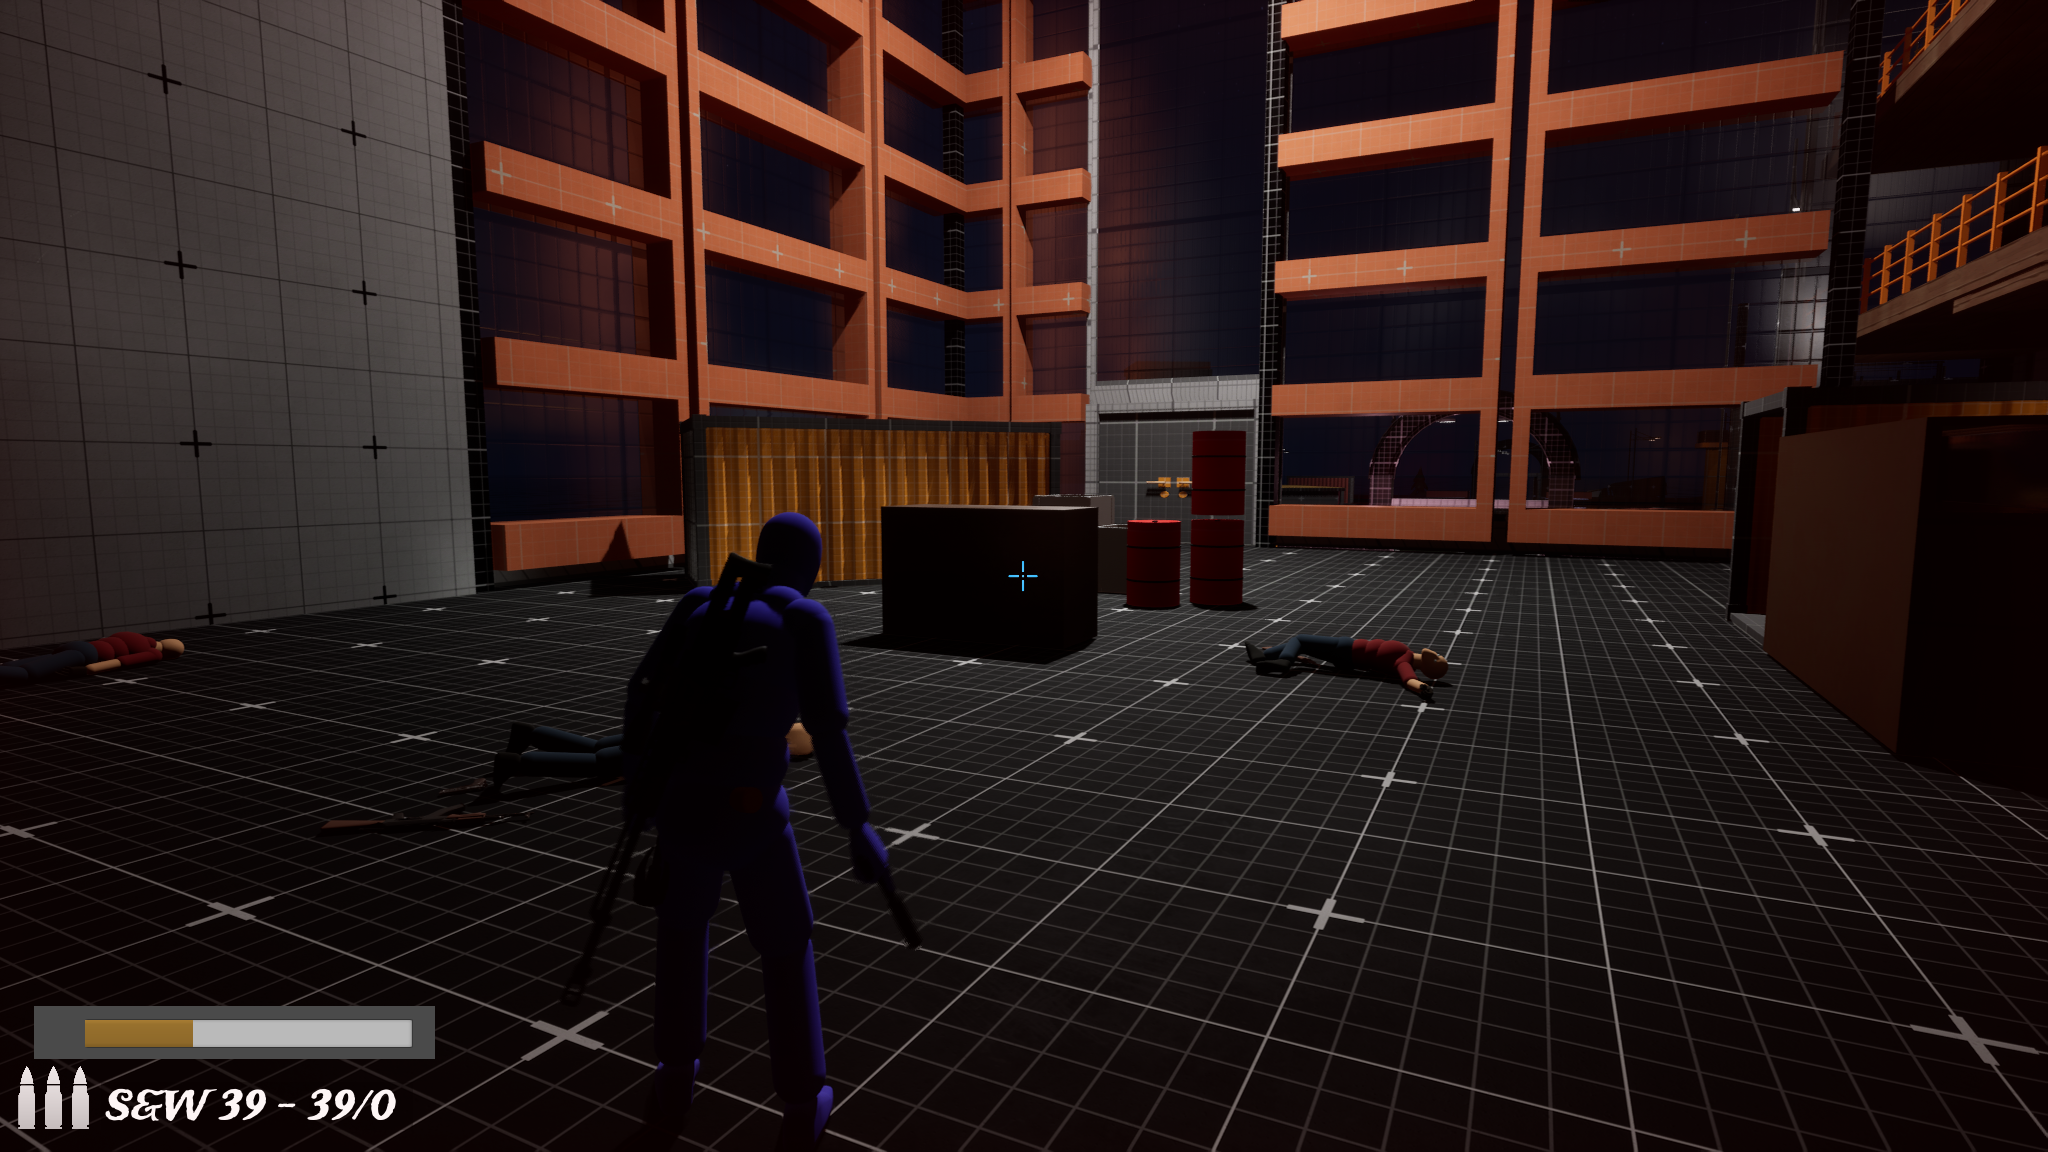
Fig 17. Atrium spatial reset — dinosaur exhibit landmarks the Archive wing.Fig 18. Shift from neutral tones to pulsing red signals a high-security zone.Fig 19. Disabling the jammer triggers the fail-safe countdown.
The fail-safe forces a Panther sprint through the museum’s lower levels — from methodical stealth to high-pressure combat.
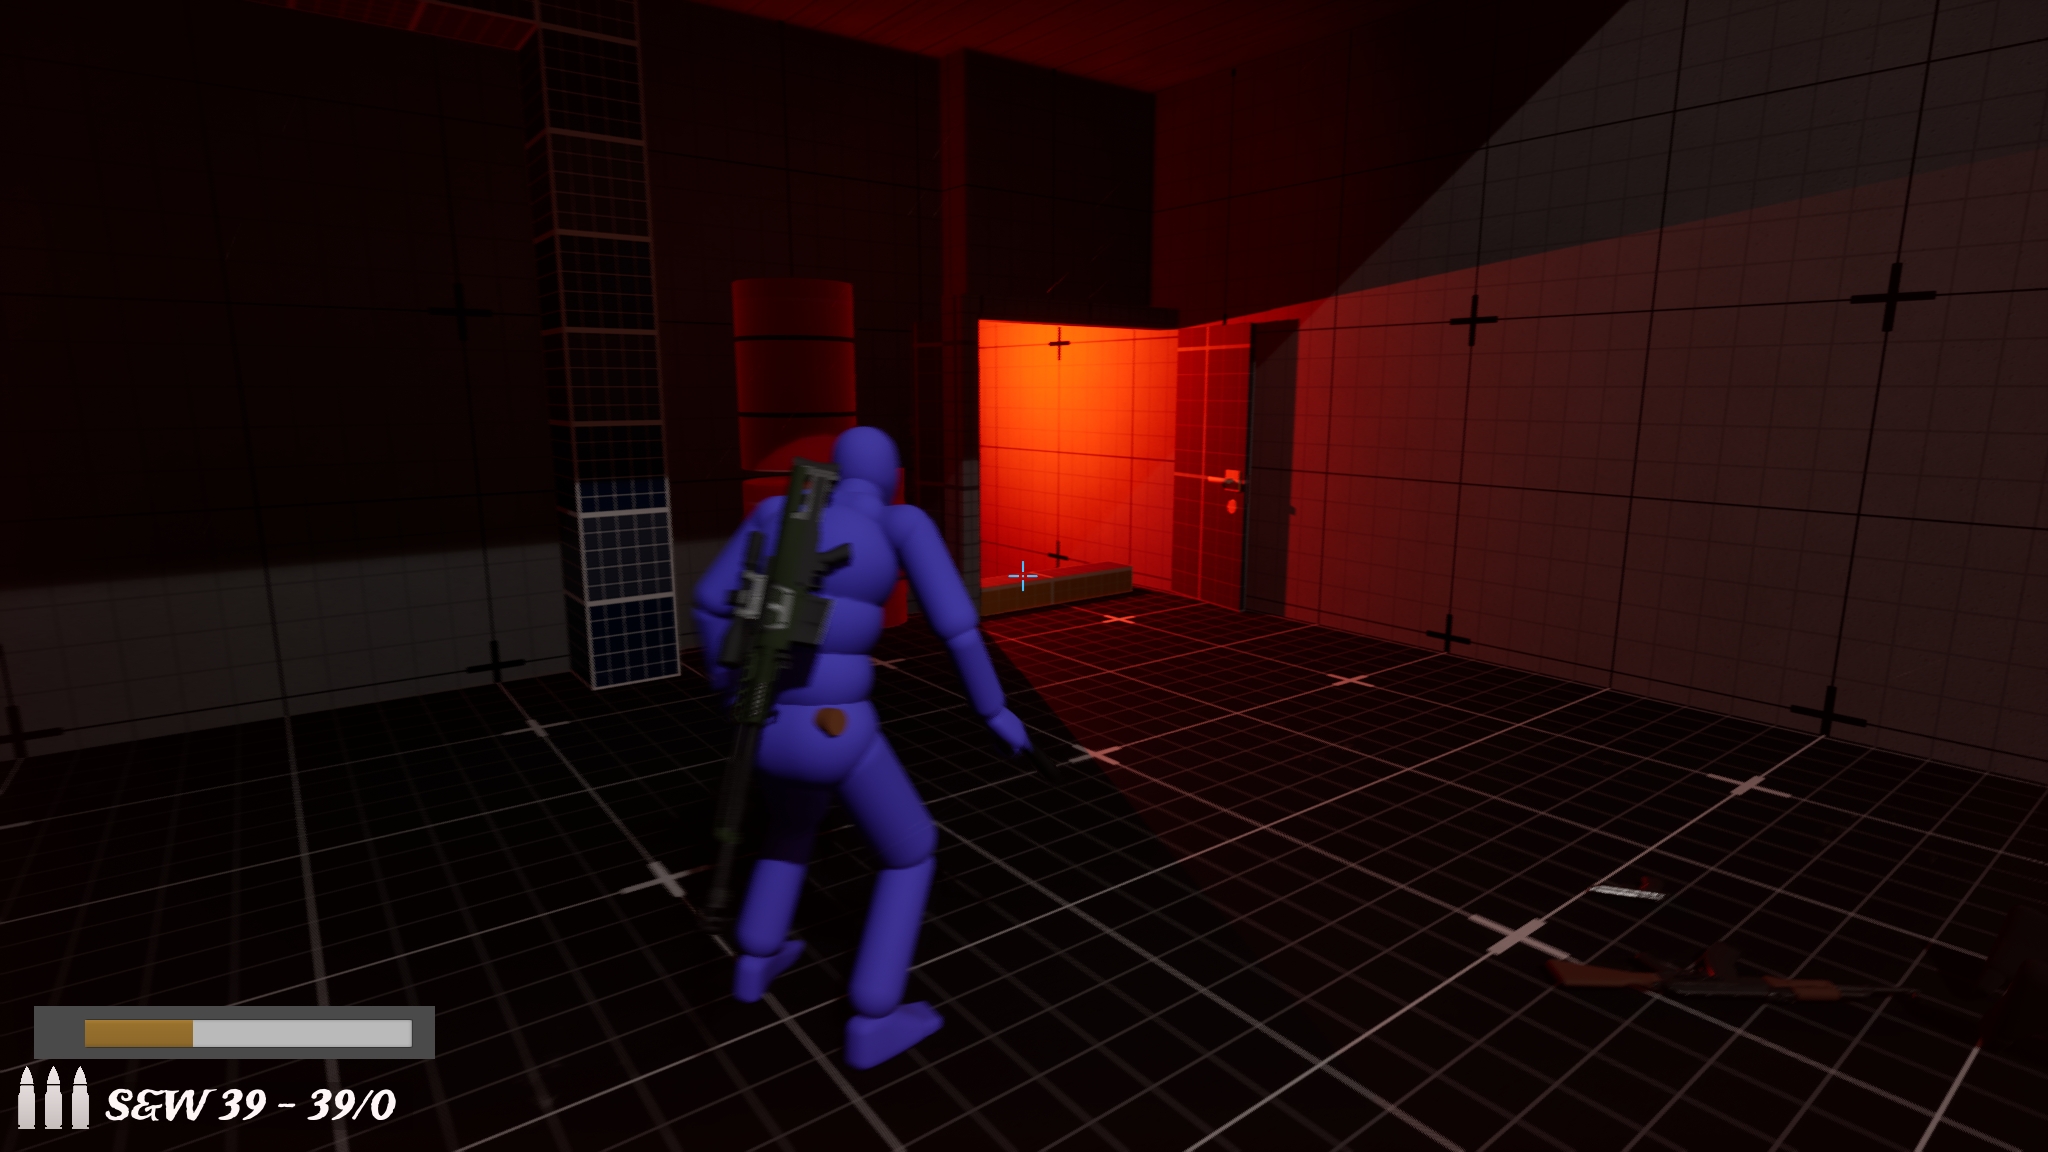
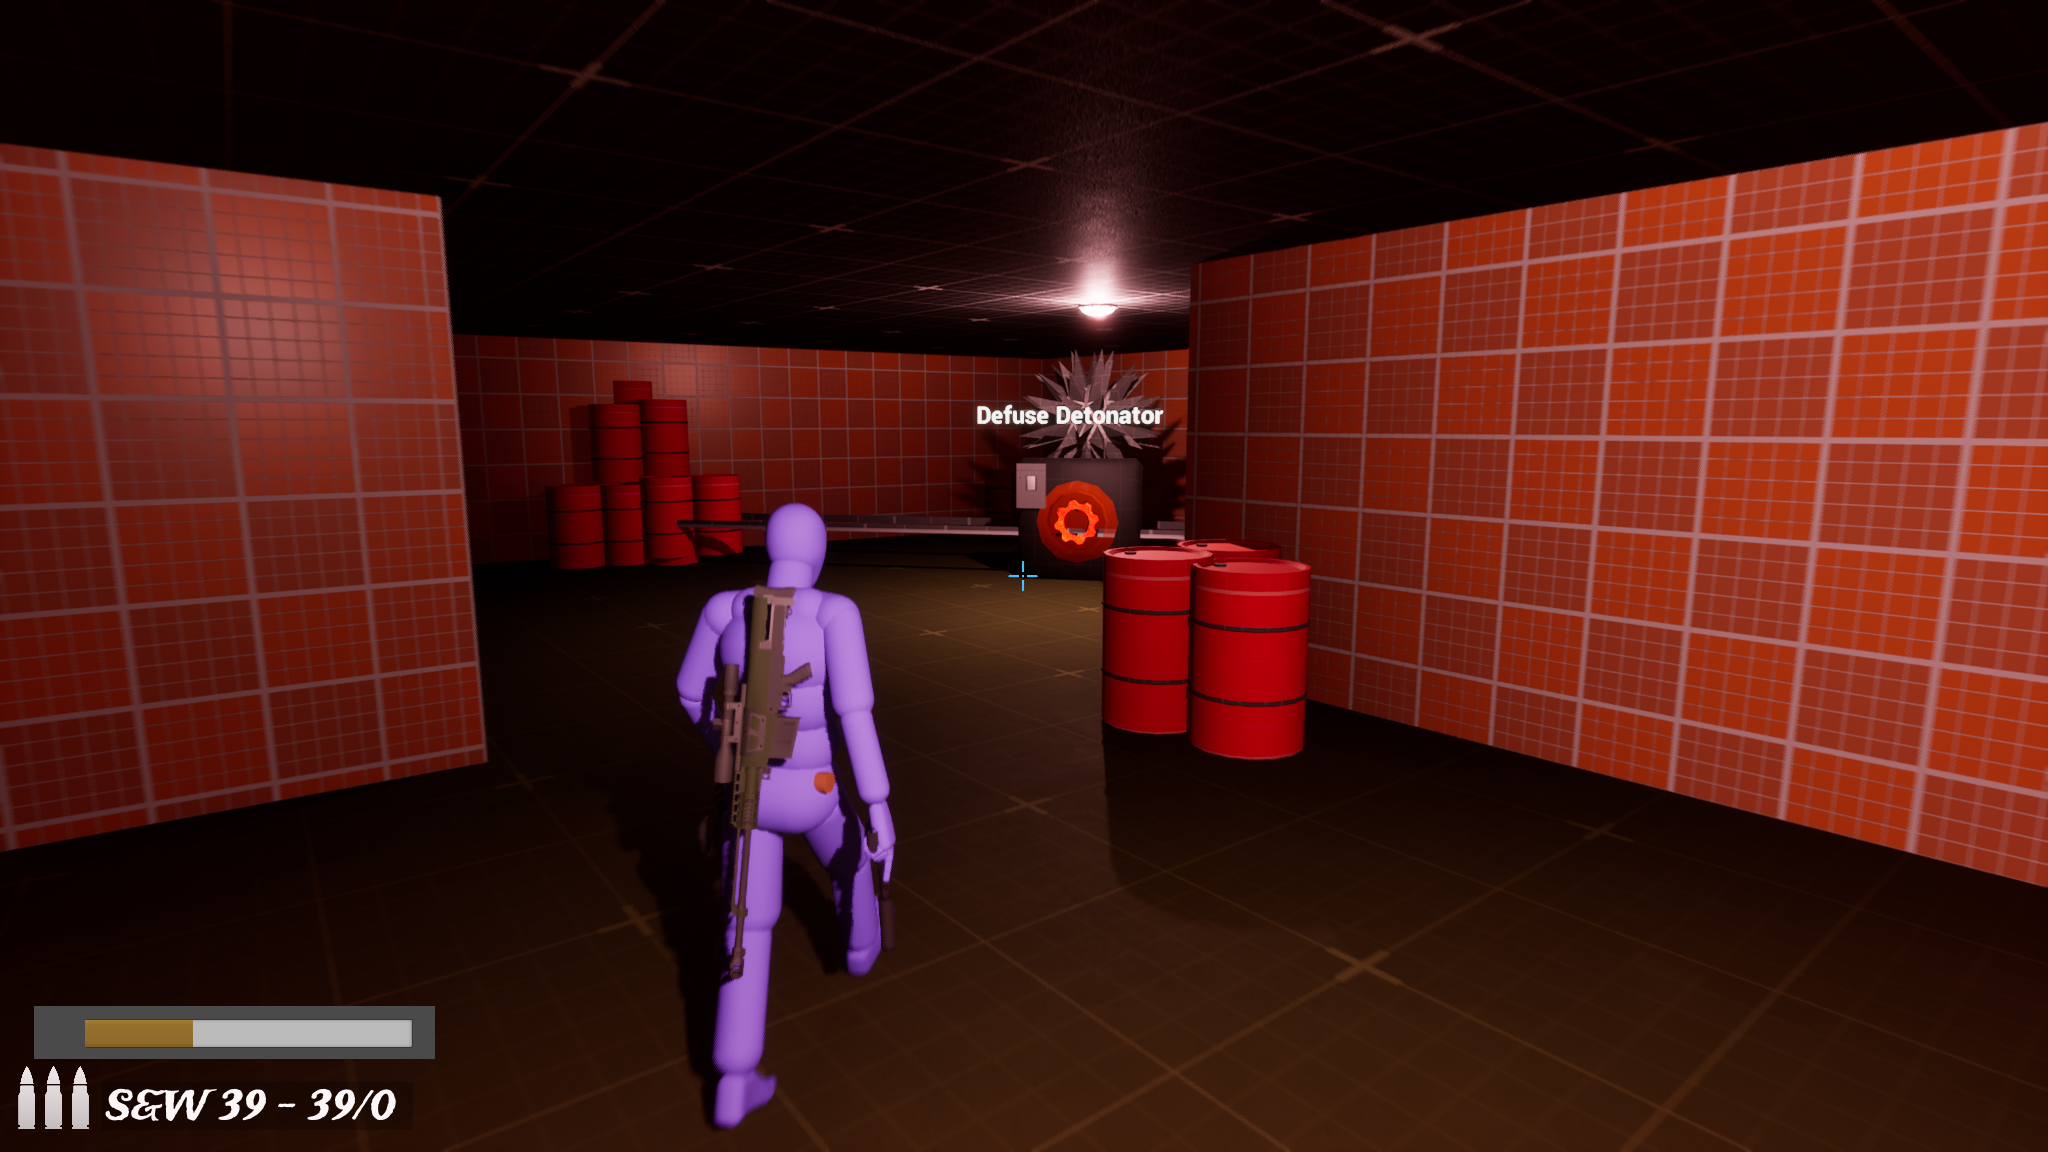
Fig 20. Spatial consistency — the earlier-framed basement door gives a clear mental map under time pressure.Fig 21. Pulsing red glow and explosive barrels — entering the most volatile part of The Rooms.
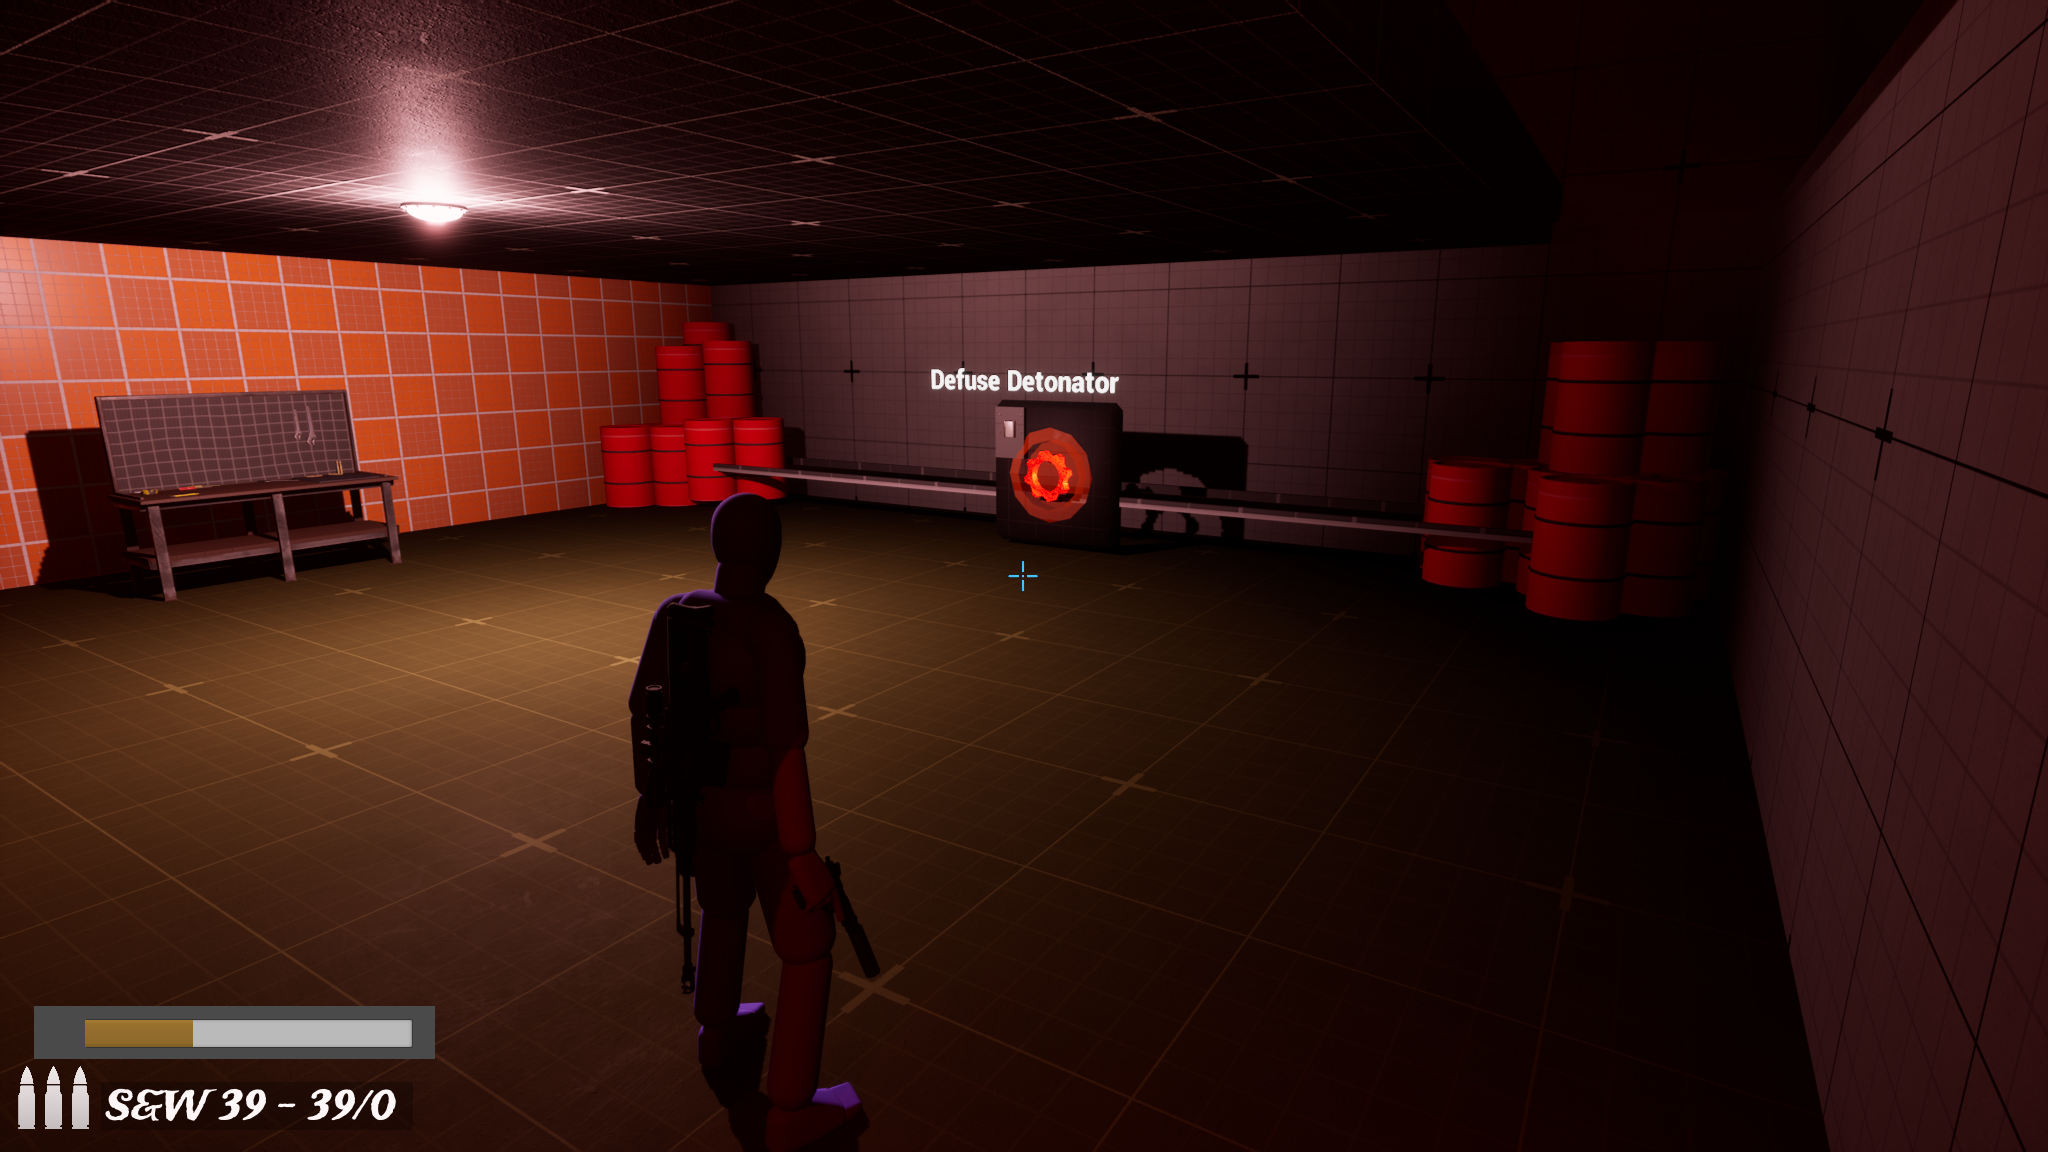
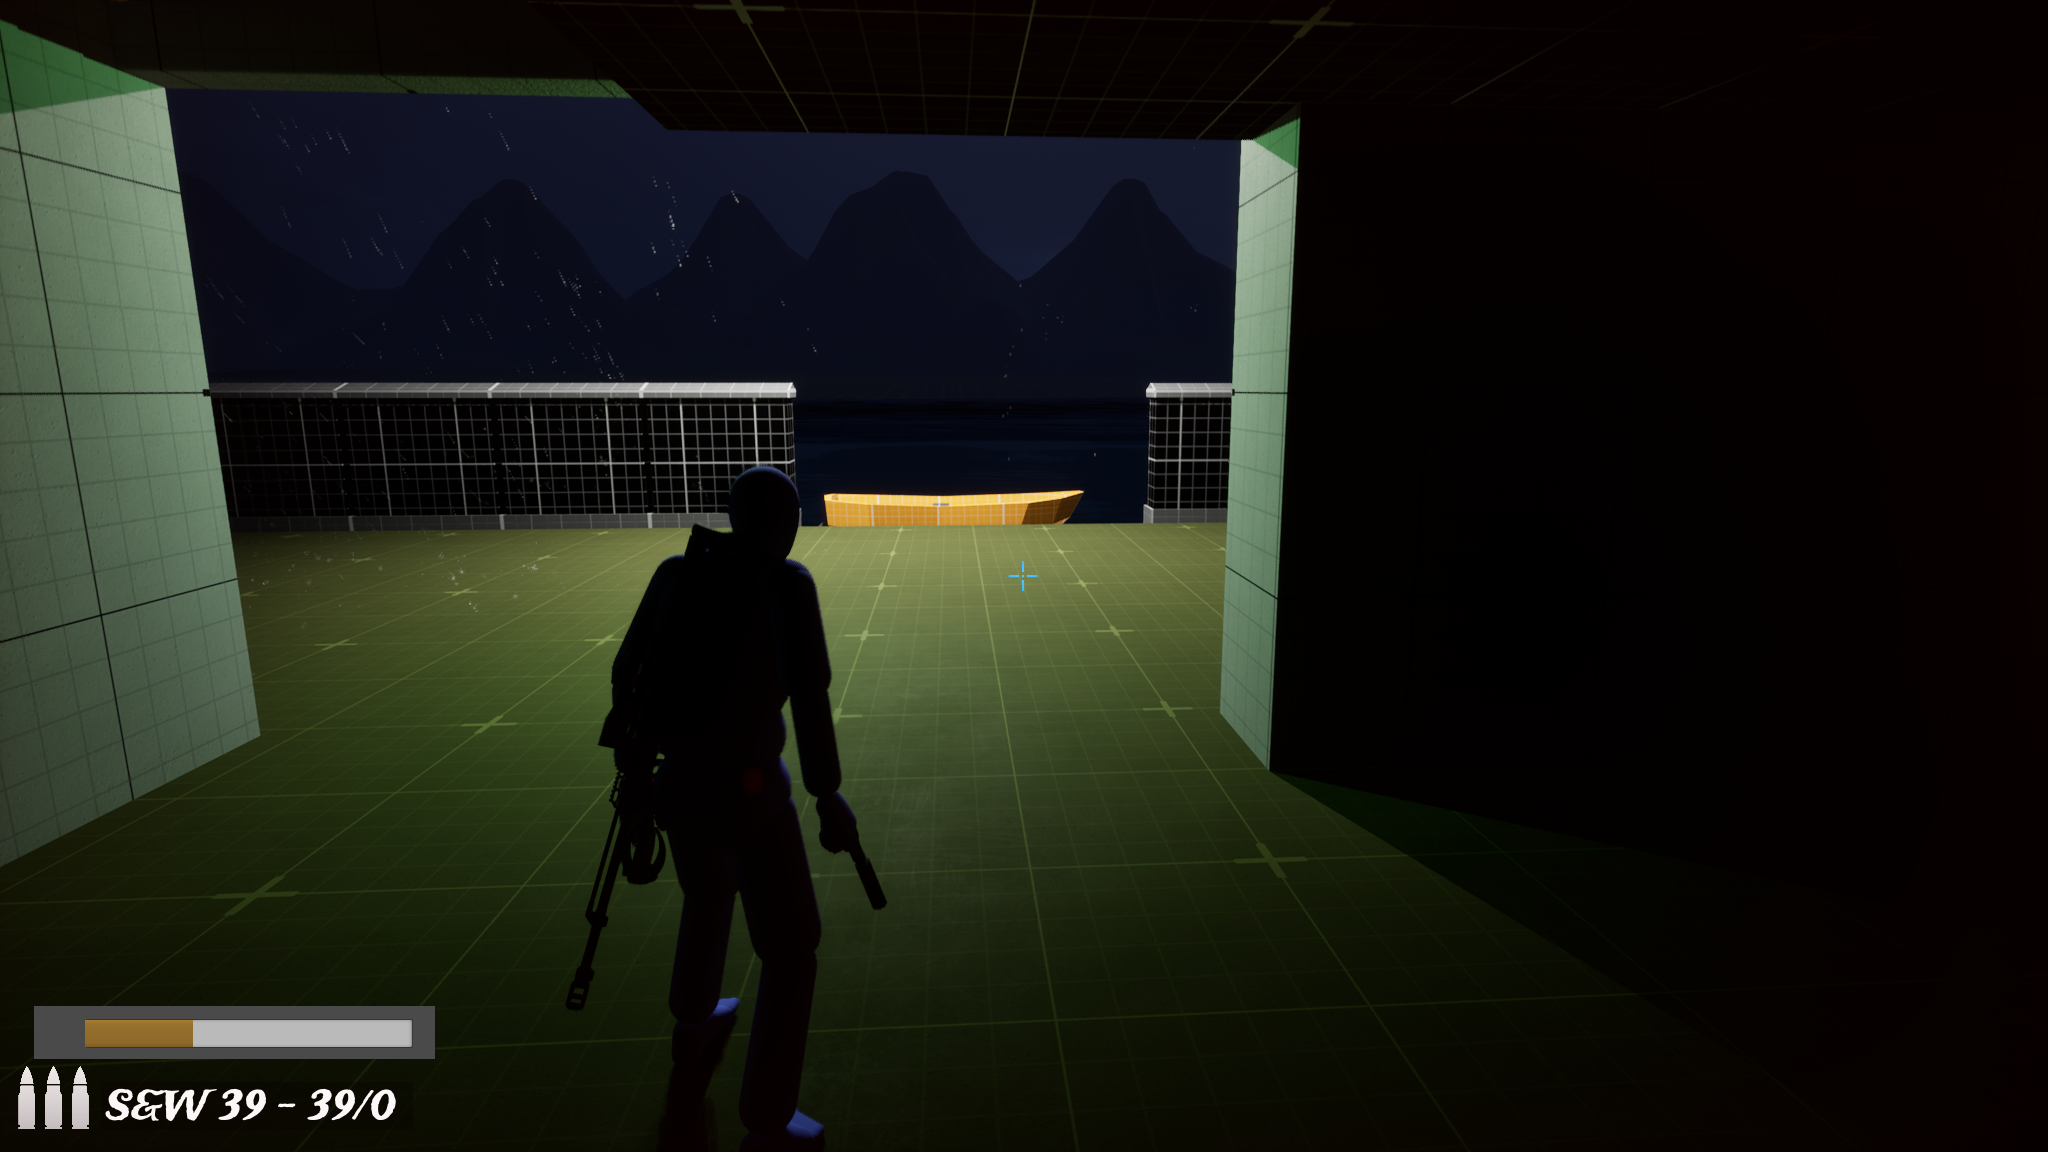
Sid reaches the subterranean basement with seconds ticking. After neutralizing the master detonator, a desperate sprint ends with a Leap of Faith into the ocean below.
Fig 22. Red barrels and hazard-orange tiling reinforce Red = Danger/Rush before enemy backup arrives.Fig 23. Master Detonator — minimal cover, clear fast and defuse before zero.Fig 24. Cool green glow signals mission safety — Leap of Faith from the museum threshold into the water.
Pacing
A deliberate tension arc: low-pressure exploration, mid-difficulty stealth, a narrative breather, then fail-safe countdown and defusal before the escape.
Phase 1: The Hook
Fast mechanical onboarding — ladders, crouching, and silent kills in a low-risk space to build confidence.
Phase 2: The Pivot
The Trailer Hack drops intensity — a breather so the plot twist sinks in before final escalation.
Phase 3: The Climax
Fail-safe countdown forces Panther combat, peaking at the Master Detonator.
Intentional Rule-Breaks
Fail-Safe Timer: At the 15-minute mark, a visible countdown, music tempo change, and dialogue force a shift from Ghost stealth to speed.
Squeaky Floors: In the Archives, floorboards creak even when crouching — a noise ripple VFX makes the interior feel more fragile than the construction site.
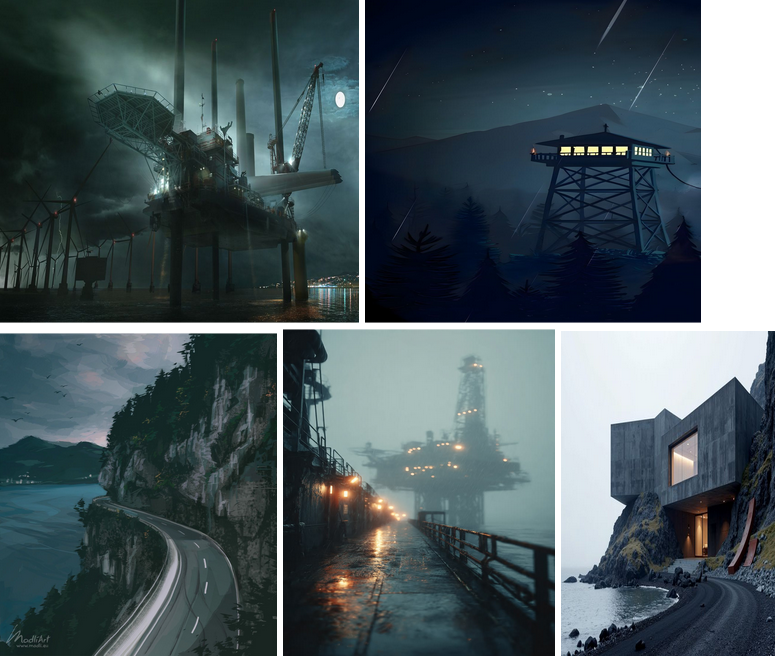
Visual Identity
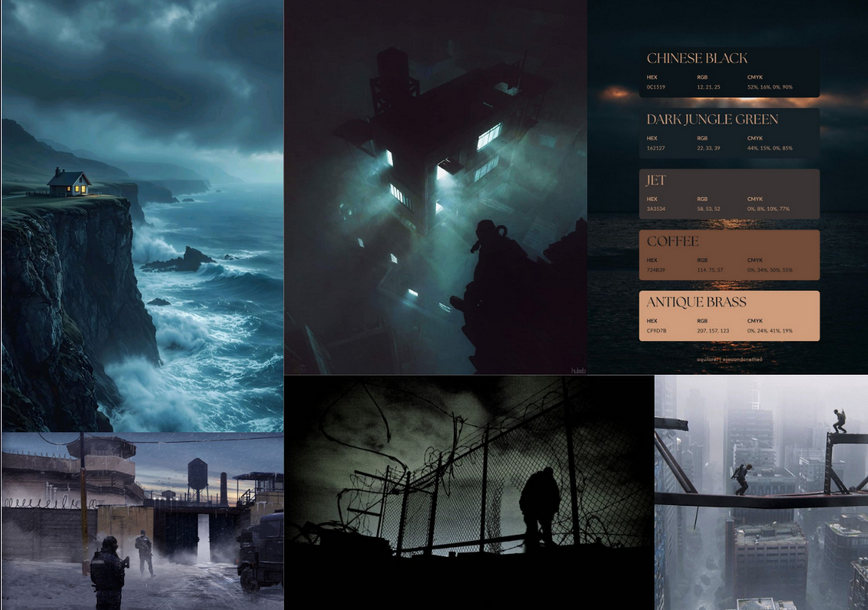
Harsh Newfoundland coastal weather defines the aesthetic — cool blue environments contrasted with warm objective lighting for natural navigation cues.
Atmosphere: Heavy Rain / Night
Color Palette: Deep Blues / Neon accents
Key Reference: Splinter Cell: Blacklist
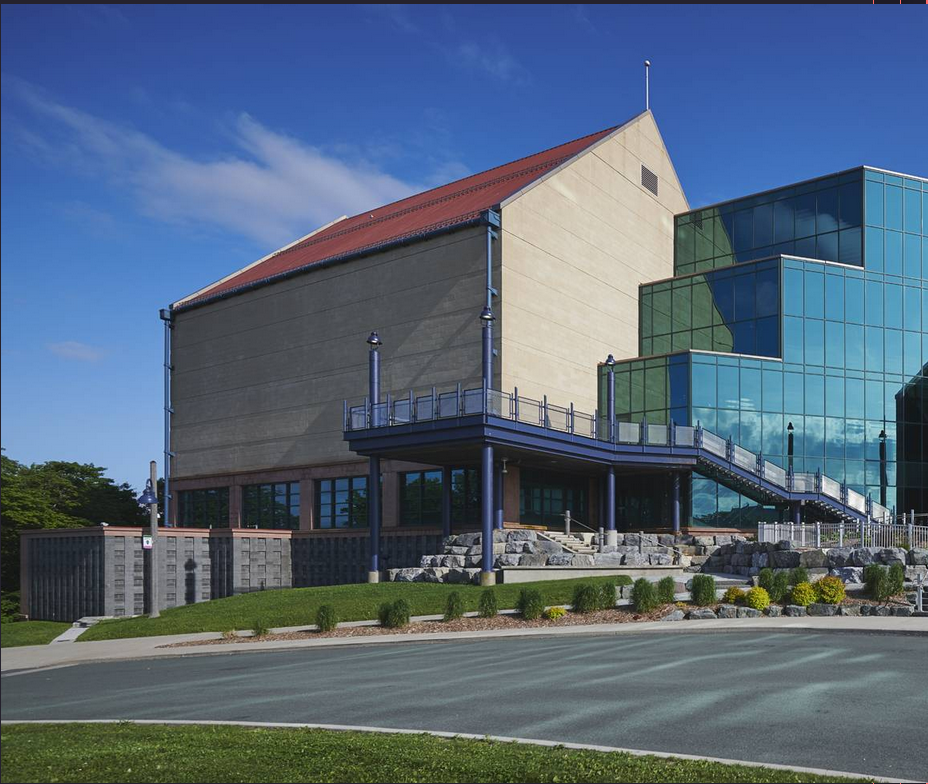
Fig 25. Mood board — Chinese Black and Dark Jungle Green swatches with neon-on-wet-concrete night references.Fig 26. Real-world The Rooms building — tiered structure enables the Leap of Faith extraction and verticality.Fig 27. Reference sheets — warm interior glows pull the eye toward targets in the cool blue storm.
Iteration & Learnings
What Didn’t Work (and How I Fixed It)
Problem: Early bomb countdown iterations felt punishing — players got lost in museum corridors during the 10-minute dash. The challenge was navigation confusion, not enemies or the timer.
Solution: Simplified basement paths to straight corridors with clear signage and pulsing red emergency lighting during the countdown — difficulty now comes from combat and time pressure, not disorientation.
Key Takeaways
Dual-playstyle spaces don’t require double the content. Cover, elevation, and hazards let the same room serve Ghost and Panther — geometry does the branching.
Location is a design tool. St. John’s enabled crane traversal, building-collapse threat, and the Leap of Faith escape.
Pacing shifts need spatial support. Complex layouts for slow stealth; simple linear paths for high-speed pressure.
Next Steps
Future iterations: playtesting heatmaps, additional environmental kills in the museum interior, and a secondary Intel Folders objective chain for completionists.
.png)